Tuesday, September 10, 2013

Freezing tomatoes--'tis the season.

Like it or not, the fruit and veggie seasons are quickly coming and going.  They are not stopping to wait for me to be less busy so that I can freeze, dehydrate, and can them.  No, I have to work around their schedule, not vice versa.

Right now it's tomatoes.  They are coming to the farmers market by the box-load.  I picked up a 20 lb box on Saturday, so that I can have some summer-sunshine in my lunches and dinners through the dark winter months.  But...time is of the essence, so I had to figure out how to best get this job done quickly.

I learned something great from a lady at the farmer's market, who grows a lot of the things we've been eating all summer.  She told me she just freezes her tomatoes, whole.  Then when she wants to use them, she just runs them under the tap water, and the skins slip right off.  Cut out the core, and they are ready to go into the pot for soups, stews and sauces.

The idea intreagues me, because...lets be honest...it involves, like, no work whatsoever, and virtually no time investment, unlike canning, and even dehydrating (which is far less work than canning, in my opinion).

So I looked for a reliable web resource to make sure I wasn't missing anything, and to make sure this was a safe and well-tested food preservation technique.  Major university extension departments are usually the best place to find such information, as they usually have up-to-the-minute research, and funding for new research all the time, on the topic of food safety and preservation.

The first university document I came up with on the particular technique was out of UC Davis.  I will link it for you right here .  This document recommends cutting out the stem scar prior to freezing.  Our own county extension agent (who I've been spending a lot of time with lately...I've been taking lots excellent food preservation classes from her) suggested perhaps leaving the stem scar intact to reduce cut surface area that would be more prone to freezer burn.  That was simpler and less messy, so I decide to try that route.

I wish I had the time right now to can tomatoes and make and can salsa, but this isn't the best time for immersion in such a delightful pursuit, sadly.  And tomato season waits for no man (or woman).  So I gotta just "make hay while the sun shines", and get them stored up as quickly as possible.

Truthfully, there's NOTHING like summer tomatoes.  They can not be replicated by those cardboard-tasting imposters that masquerade as tomatoes in the stores in the dead of winter.  (Those things make me sad.)  The next best thing is commercially canned, in my opinion, especially Muir Glen fire roasted (my fave)...but I don't love to serve food that comes out of a can super often, because of BPA in the can lining.  I'm not going to freak out over using some commercially canned tomatoes sometimes...but...the less BPA the better, in my opinion; and these freezer bags are BPA free.

Here's the 20 lb box I bought.  Paid $20. for it.


I washed the tomatoes and dried them off.  Then laid them on parchment-lined baking sheets and stuck them in the freezer.


The next day I took the rock-hard frozen tomatoes and sealed them up in vacuum-sealed food saver bags, but you could easily just use freezer ziplock bags.  Just try to squeeze as much air out of them as possible before sealing.

Use oven mits to handle the cold trays, and then use tongs to transfer the frozen tomatoes into bags, so you don't freeze your fingers!


Into the deep freezer you go.  See you in December.

Monday, September 9, 2013

#16 Curried Lentil and Vegetable Soup--total flop.

The freezer waffles and freezer breakfast burritos I put together this weekend are paying off--big time.  This week is starting out way better than last week, and though I've been running like a rabid energizer bunny today, I'm feeling like things are kinda starting to come together for fall.  Kinda.  At least we have food. So that's good.

Right now I'm doing a temporary stint filling in for someone I know who is on vacation.  So part of the day I get to play the part of a delivery driver. :)  Something about that feels kinda strong and athletic to me.  It's like an obstacle-course event:  drive, hop out, run in places, carry stuff into buildings, quick exchange of chit-chat with whoever crosses my path, run back out, hop in vehicle, and repeat.  It's like cross-fit; real-life edition.  Move fast in short bursts.  Lift heavy stuff.  Except I don't have to pay to do it; instead they pay me!  Can't beat that deal.  A little boost for the cookbook fund.

Anyhoo.  So I have to be pretty organized this week.

I made "Curried Lentil and Vegetable Soup", from Healthy Slow Cooker Cookbook.  But...I had problems.

One thing I liked about this recipe is that it is super-frugal, and totally "gathers up the fragments".  I had veggies already cleaned and chopped, leftover from last week, so those were done, just had to dice them up a bit smaller.  The lentils; I went ahead and soaked them overnight in filtered water with a bit of lemon juice, (which is what is recommended in Nourishing Traditions). The recipe calls for canned tomatoes, and some yummy stuff like curry powder and cumin.  It smelled scrumptious when I got home.

However, something interesting happened: this soup was supposed to cook 8 hrs on low, but even after 9 hrs the lentils were still somewhat "crunchy".  Thankfully, I had a chicken I had roasted, so we just had chicken sandwiches for dinner. 

Here's what I found out, to save you some frustration:

  • Greenish colored lentils take forever to cook.  WAY longer than brown or red lentils.

  • I knew this, but forgot, and added salt to this dish right from the get-go, as the recipe said to...don't add salt to legumes while you cook them.  It toughens them.

  • Also, acidic ingredients such as tomatoes and vinegar, lemon juice, wine...these things drastically lengthen your cooking time in regards to all legumes, not just lentils.  And yes, there were tomatoes in this dish.

  • I don't know...maybe the overnight soak in water with lemon (I used 1 T. lemon juice) toughened the lentils?

So there ya go...the perfect storm of problems with this recipe, in terms of getting the lentils cooked in a timely manner.  Next time I will use red lentils, wait on the salt until serving time, and I don't know...wait on the tomtoes until the lentils are soft?  Just cook them in the broth and water first?  I would also soak the lentils overnight in water only...and not use the lemon juice.   Also, I would omit the cumin from this recipe.  LOVE the curry, but the cumin was distracting, in my opinion.  And it was kinda "hot", like spicy, not in a good way.  I don't know, it just wasn't working for me.  I ended up giving up on it and throwing it out.

Bottom line...I don't think this recipe was worth the frustration of attempting it again. 

However, I do have a recipe that I will link for you, that is the BEST soup ever, in my opinion, and has a similar flavor profile.  Oh my goodness; it is so, so good.  Strangely, my family disagrees with me on it though...they are not huge curry fans.  But read it and see what you think.  As far as I'm concerned, it's one of the best things I've ever tasted coming out of a crockpot.  It's "Mulligatawny", by Stephanie O'Dea at "A Year of Slow Cooking".  Here is the link for you. 

Sunday, September 8, 2013

Waffles for the freezer

As I may have mentioned, school (and everything else) started this week. 

Everything kicks in all at the same time. It's quite a full-system shock.  Along with the radical full-family schedule change that is "school", there's also weekly Bible study group, music lessons, fall stuff going on at church, homework, fundraisers, field trips, substitute teaching, weekly early morning meetings, schedules, lunch-packing, driving, driving, driving, phone calls to make, appointments to keep, and the resuming of busy-ness, obligations, "have to's", and responsibilities.  Suddenly life moves WAY faster, and it's tricky to find a handle to hold on to it.  Some people thrive on a fast pace of life, and lots of structure.  Me...not so much.  In fact, not at all.

Usually when September comes I'm at least somewhat mentally prepared.  Ready to shoulder and carry all that structure again.  Not this year.  I'm feeling nostalgic for the old pre-school days which, in my memory, were the essence of sweetness: crafts, play-doh, reading library books all snuggled up the big chair, swinging at the playground, housework, cooking, and laundry hanging on the line in the back yard.  Life moved slowly, because there were rocks to inspect, clouds to view, and bugs to discuss.  Time moved in natural ways, with the rhythm of the sun, and the seasons. Days were long, in a really good way. 

The non-schedule of summer is reminiscent of that (minus the play-doh and picture books now-a-days.).  Summer is when we are carried along by creativity.  We can be fully immersed in a project or task without the burden of watching the clock. 

But then September arrives, and for the next 9 months I have this thought about a hundred times a day:  "I have to HURRY".  No more creative flow, instead it's "hurry".  September is time to switch gears, even though the sun is still hot.  I'm still wearing flip-flops and shorts, but we're back on a time-schedule; the clock and the calendar loom large, and my brain can't process that dichotomy.  The clock becomes a hard task-master; it pushes, presses, hassles, and and harries.  Time moves in quick, jerky, robotic, and stressful ways--not natural, and not according to the sun and the seasons, but according to the artificial and contrived demands of the schedule, the calendar and other people. 

Time to be "grown-up" again.  Time to forgo the simple, sweet joys reading in the sun, swimming, making popsicles, vacation Bible school, strolling around the neighborhood with the dog at 9:00 pm when it's still light outside (but finally cool enough to walk), listening to the frogs and crickets, and (for me) blogging to my little heart's content, in my sweats and tee-shirts, with my trusty early-morning coffee by my side.

I don't really love the whole "being-a-grown-up" thing. 

Being a kid is so much more fun.

 I love to lose track of time, rather than keep track of it.  

I'll probably mourn for a few more weeks.  But once October hits and the leaves change, and the weather cools, I'll recover.  Eventually this new pace will be "normal" again, I hope.  When I pull out the fall decorations, and the pumpkins turn orange, I will re-energize.  There's a lot to love about fall too.  I'm just not there yet.

I gotta find a way to snap to, and pull it together here.  Time to engage, face facts, and get down to some prep-work that will make life simpler in the next few weeks, and ease the transition back to reality.

Hence:  Freezer Waffles.  I'm doing double duty, using up some gigantic bags of Pamela's Gluten-Free baking mix, AND stocking my freezer with waffles for quick breakfasts and lunches on the go.  I'm also hoping to get down to business on some breakfast burritos before Monday.

Now, waffles.  Are they really the healthiest thing ever?  No, not really.  I wouldn't be eating them every day, or soaking them with added sugar (like syrup). 

But some busy days, I feel ok about a breakfast of homemade waffles, topped with high-quality protein, like eggs, or turkey and cheese, and maybe a piece of fruit on the side.  It's not a fresh veggie scramble with sautéed organic greens, but it's not a store-bought pastry or cereal either.  For me, I'd say it's a compromise between perfection and reality.    

Here's the reason why I emphasize homemade waffles, as opposed to store-bought:

If you have food allergies or sensitivities you can make waffles (or pancakes or muffins for the freezer...) to your specifications: no dairy, no sugar, no gluten...however you need them to be. 

If you eat grain-free (Paleo or Primal) you can certainly make them with almond flour or coconut flour instead of grains. 

Even if your family eats grains, this might be a great place to diversify the grains you consume...try out something other than wheat for a nice change.  The nutrient profiles of various grains are different, and you may really enjoy the varied flavors and textures. There are zillions of choices to try:  buckwheat, teff, sorghum, coconut flour, brown rice flour, quinoa flour...endless possibilities.  

Recipes are everywhere on the internet, and there are some fantastic cookbooks available at the library.  Three books I really love are: Simply Sugar and Gluten Free, by Amy Green, and The Whole Life Nutrition Cookbook, and Nourishing Meals both by Ali Segersten and Tom Malterre.  Both Amy, and Ali and Tom have great websites and recipe blogs. 

When you make things yourself you can choose what you want your family to consume, and really, that's the whole point. 

One of my goals this year is to learn to make gluten-free waffles and other baked items prepared by traditional techniques such as soaking/sprouting/fermenting, like (buckwheat sourdough) (see Sally Fallon's book Nourishing Traditions and Ali and Tom's book, Nourishing Meals) but meanwhile, I need to use up this Pamela's mix, and my family really loves these quick easy waffles, so here we go:

STEP 1:  No new info here folks; just mix up your favorite waffle recipe. 

One thing I've noticed is that if you follow the advice of many recipes and whip the egg whites separately, and them fold them into the batter for a crispier waffles, what you end up with is a waffle that is STUCK like cement to the waffle maker!  So I just add the eggs in whole and do not separate them.  Also, even if your waffle maker is "non-stick", still...grease that puppy up unless you want to be digging rock-hard waffle batter out of every nook and cranny for the next 30 minutes.


STEP 2:  Then bake in a waffle maker.  I find that if I use a flat edged bamboo (or wooden) spoon to scoot the batter evenly into all the corners I get a much better looking waffle.

STEP 3:  Cool on baking racks--that's important, so the waffles do not go soggy on you.


STEP 4:  Then package into Ziplock freezer bags.  I sometimes like to put sheets of parchment between them so they don't stick together, but that's optional. 


STEP 5:  Label with the date and freeze.

Keep frozen until ready to use.  They go directly from freezer to toaster oven (or a regular toaster, I guess...we use a toaster oven). 

Here are some fun toppings and fillings for your waffles:
  • fried or scrambled eggs and cheese
  • fried or scrambled eggs and bacon
  • egg salad
  • nut butter (almond or cashew are a fun change) and low-sugar jam, or fruit preserves
  • nut butter and banana slices
  • turkey and swiss
  • chicken salad, made with apples and walnuts in it, yum!
  • or top with sliced peaches or berries, and yogurt with a cinnamon sprinkle.
What are your ideas for using frozen waffles on busy weekdays?  Chime in the comment section and tell us what you think.

Friday, September 6, 2013

#15 Countryside beef and garden vegetable soup

This week has been a real shock to my system, to say the least.  But, I did slip down to the farmer's market on Wed. for some goodies to finish off this crazy week. 

How about you?  Do you need strength?  How about your kiddos?  Exhausting first week?  Make some soup.  It'll cure what ails ya.

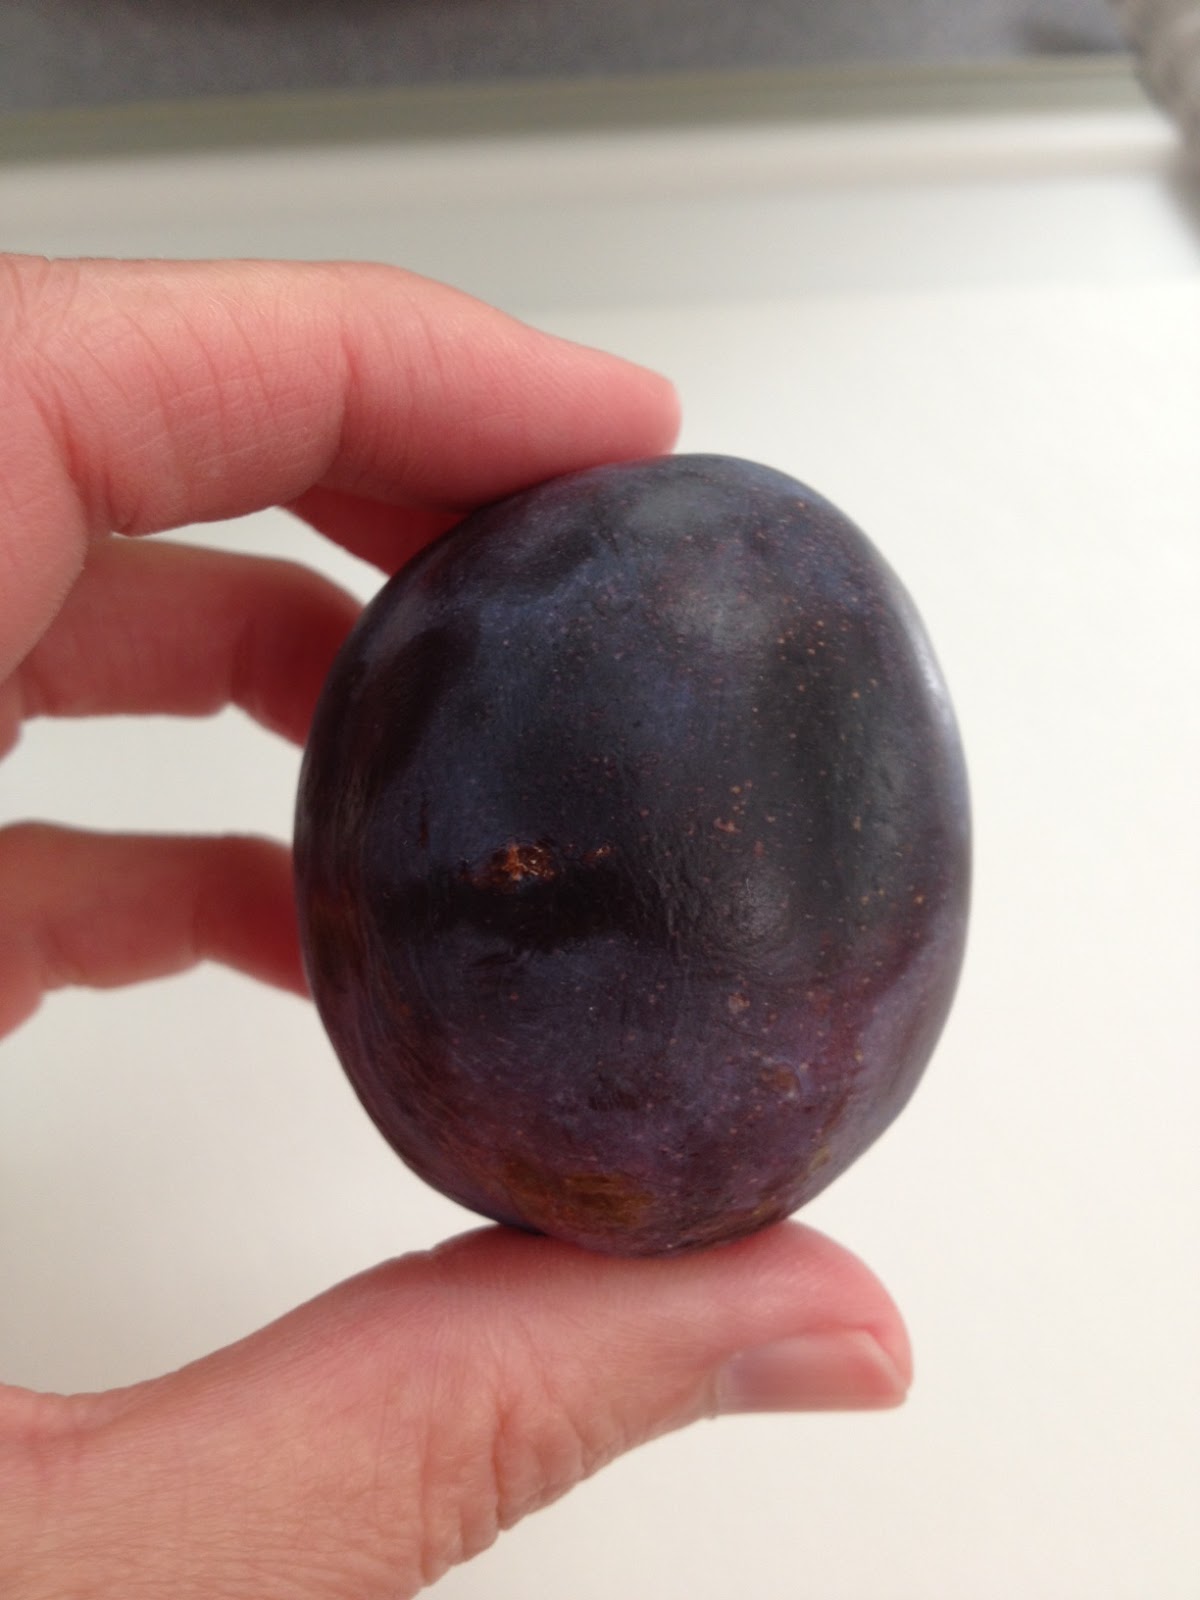
Market finds:  Bartlett pears, Italian Plums, red pepper, Romas, green beans, and a little head of cabbage.  Total cost = $16.90.
 
 
The pears were eaten fresh, the plums made into lunchbox snacks (see yesterday's post ...) and the rest went into a lovely, and super-powered soup:  "Countryside Beef and Garden Vegetable Soup", from Healthy Slow Cooker Cookbook, by American Heart Association.
 
Besides the above pictured veggies, this soup contains 1 lb of beef roast, cauliflower, celery, a potato, and some other stuff.  Guess what?   I found the recipe online for you:  right here.  (The blog it's on lists the source as Women's World magazine, so it must have been printed there too.) 
 
My verdict on this soup:  Tasty.  I loved the flavor.  It needs a few tweaks though. 
 
I put it on low and after 5 hrs the beef was still rock-hard, so cranked it up to high. After 1 hr on high the beef was tender and juicy, perfect, so I took it out, cut /shredded it, and tossed the cabbage in the pot, AND put the beef back in for another hour on high.  Bad mistake.  Another hour on high was great for the veggies...not so much for the beef.  It dried it out.  Moral of the story:  when the beef is perfect, don't cook it any more.  I should have just refrigerated it right then and there, and tossed it into the soup right before serving. 
 
Also, there was nowhere near enough liquid in this soup.  Next time I will add in 2 c of homemade beef stock right from the get-go.  Oh YEAH.  That would be awesome.
 
And one last thing that will make a great difference...after you take the beef out to shred it, you might want to stick an immersion blender in the crock pot with the veggies, and give it a whirl for a second or two.  Not til it's totally smooth!  You still want chunky veggies.  So just a little blending.  That would add a bit more thickness and body to the broth.  The beef bone stock should help with thickening too. 
 
And don't be temped to add more than 1 lb. beef.  I used 2 lbs., cuz one pound of roast looked so tiny!  But it was actually just too much.  They were right.  1 lb. is perfect.
 
It's getting a little drizzly outside.  I think cold and flu season is right around the corner.  Man, this would probably be an extremely healing soup to make ahead and freeze, for those upcoming cold-induced soup-eating emergencies.
 
Nourish on!


Thursday, September 5, 2013

Italian Plum lunchbox snacks

Sheer craziness.  School started this week, and along with that jarring schedule change, my car broke down, the house is in utter chaos because we are having the carpet replaced, and I'm working part days (outside the home) the next two weeks.  Yet, in the midst of it all, Italian Plum season quietly arrived.  Don't you just love steady, faithful, unflappable things like that?  
5 lbs. Italian Plums = $5.
 

I have the sweetest memory of my 5th grade teacher, (a hobby farmer in the summertime) who would bring his home-grown, home-dehydrated, Italian Plums to school in his lunch.  Several students, including myself, would joyfully give up our recess time to circle around his desk, our 10-year-old hands outstretched for treat...a tangy-sweet, leathery plum.   Poor man!  We gave him no lunchtime peace whenever we caught a glimpse of that baggie full of dried plums sitting on his desk.

Thirty years later, I know how truly patient he was to share his lunch, and moreover, his lunch time with us, when likely there were copies to be made, prep work to do, and what should have been a few precious moments of peace and quiet in the classroom.   The lesson I remember, deeply etched, is that good, healthy food from the earth is a treasure and a gift.

One of my favorite books on the subject of food dehydration is called Food Drying with an Attitude, by Mary T. Bell.  In it she relates her early experience as a demonstrator of electric dehydrators at an appliance store.  I've always loved this quote: 

"I'd set up my table, fill my dehydrator, and offer passersby samples of dried bananas, apples, applesauce, and pineapple in hopes they would want to purchase a dehydrator.  Adults would politely say they were full, or it was Lent, or they simply didn't like fruit.  It was the children who relished my samples.  Again and again they returned, showing me the palms of their hands, and ask(ing) for more dried fruit.  Those little hands gave me the encouragement and resolve that food drying was something important."

I think of this quote all the time, in regards to the children in my life.  Seems like most of us have children in their lives, one way or another...children of our own, grandchildren, nieces and nephews, friends, or students.  We are all "teachers", whether we want to be or not.  The little hands in our lives are always outstretched to us, palms up.  What shall we put in those little hands?

Will we hand them real foods, whole foods; things that grow in the soil, and graze in the grass; things that will really nourish them?  

Maybe we will show them how to love the kind of good food that loves them back.  

One way or another, we do convey a message.  We do have far-reaching influence, in terms of how they will one day choose to nourish themselves.   

Dehydrated Italian Plums

(If you do not have a dehydrator, I think the best thing would be to just EAT the plums, fresh. They are delightful, just like that.  I have never tried to dehydrate in the oven, but if you have done it successfully, then chime in the comments and tell us about it!)

Step 1:  Select ripe plums.  These were nice and soft, when gently squeezed.  If they are hard, please wait a few days until they are definitely ripe, or they will be sour.


Step 2:  Wash and dry the plums, and then cut them in 1/2 and remove the pit.  Then cut each 1/2 into 3 even pieces.  These plums were fairly large, but if you get smaller ones you could even 1/4 them.  You want them to be about 1/2" thick, and as even as possible.


Step 3:  Line them up on your drying racks, skin side down. 


Step 4:  Put them into your dehydrator at 130 degrees.   (And here's where the science of dehydration meets the art of dehydration)...for about 18-24 hours.  If your dehydrator has a timer, set it for 18 hrs.  When it goes off, let the plums cool, and then check for doneness.  They are softer when warm, so letting them cool first is important.  Maybe, as you pass by, every so often you could rotate the trays a 1/4 turn.  If you  don't remember to do that, no biggie.

Step 5:  Your plums are done when they are "leathery".  You don't want them "wet" in the middle, but you don't want them hard and crispy.  So you just gotta check 'em til they are leathery.  The time varies a lot depending upon how full your dehydrator is, the humidity of the day, or your house...lots of factors.  It was a humid day, so mine took 20 hours.

Step 6:  Eat and enjoy!  I can just about guarantee your children's classmates will clamor for a taste if you send these dried plums in the lunchbox.  So send a few extra so everyone can sample them.  You may inspire the next generation of food dehydrationists!  

Keep out the dried plums you will eat in the near future and put them in a jar with a lid.  I go ahead and bag and freeze the ones we will not be eating in the next few days, just as a safety precaution.  All it takes is for one to be underdone and wet, and next thing you know, if they are left on the shelf, mold can develop, and then you've lost your whole batch.  So best just to freeze them and take them out as desired.

One thing to note is that 6 pieces (if you sliced the plums into 6ths) = one plum.  Just wanted to mention that, because they shrink up really small, and it's easy to sit there and eat the whole bag!    Even though these are a healthy snack, like anything, they can be over-consumed. They are still fruit, and still contain sugar, and fiber, so don't let that sneak up on you.

Have fun, this is a great project for kids to help with.  These plums work beautifully in a trail mix with nuts of all kinds.  Two indispensable resource books for dehydrating are:  The Dehydrator Bible, by Jennifer MacKenzie, Jay Nutt and Don Mercer, and Preserve it Naturally: The Complete Guide to Food Dehydration, by Excalibur.  And the best website I've ever seen for dehydration is www.dehydrate2store.com.  There are ALL the step-by-step videos you could ever dream of on that site.  Fantastic info, and free!  Have a beautiful plum season.


Tuesday, September 3, 2013

#14 Shredded Tomatillo-Chicken Filling

One of the things I'm loving best about cooking through Slow Cooker Revolution is a delightfully useful chapter on taco fillings.  The Shredded Beef I posted last month came from that section, and so does the recipe I made today, "Shredded Tomatillo-Chicken Filling".

This recipe feels and tastes very authentic.  It's a very fun thing to do, and we LOVE all kinds of Mexican/Latin American foods around here.

True confession time:  Once upon a time (last year) a group from our church got together to make tamales to help fund an upcoming mission trip.  I eagerly showed up to help, but...ok, truth be told:  it was not out of a heart to help fund the mission trip.  Actually...I just really wanted to spend time with the Hispanic ladies in our congregation who were heading it up, and learn authentic tamale making from them.  Ok, I said it!  My secret is out.  Is that really bad, that my motivations were so selfish?  Maybe, but it's the truth.  And it was SO fun!  I learned a lot, and had a great time.  Personally I think tamale-making is something you have to be handed down, you can't just read it in a book, or watch it on you tube.  It's personal.  And hey...ultimately, the mission trip got funded, so it's all good.

Ok, sorry...back to the topic: 

This was a VERY fun recipe to make.  *I'm going to just warn you ahead of time:  this one was not posted anywhere on the internet, and I can't post it here (the legality of doing so without asking permission is in question...).  So you will have to check the book for the recipe...as I've recommended before, avail yourself of your local library's services!  Our local library has it, and I'm betting your does too, or they could borrow it from another library for you. 
 
 
So this recipe starts out with a couple of Poblanos, and couple of Jalapenos, and several Tomatillos.  For anyone who has never worked with tomatillos (I hadn't before), when you take the husk off you'll notice that the green fruit inside is covered with a sticky/almost waxy-feeling coating.  I was just a tad bit alarmed!  A quick google reassured me that this is totally normal, and if it doesn't wash off all the way, no worries.  Apparently it actually contains part of the essence and flavor of the tomatillo, so yay!  Who knew??  Well, lots of people.  But not me. 

You roast those veggies up in the oven under the broiler, along with some oil and spices, then they take a spin in the food processor. 
This took 7 minutes under the broiler.  You want them a little blackened.

Then it's just: chicken + your pureed pepper mix + 3 1/2 hours on low in your slow cooker = some muy bueno Latin American eats!!
Before it was cooked...
 
And after. 
 

The recipe said 4-6 hrs on low.  As usual, this much time would have utterly ruined the chicken.  As always...check it way earlier.  I used 2 lbs of thighs, instead of 1 lb thighs and 1 lb breasts.  Mine was tender and lovely in 3 hrs and 18 minutes, to be precise.

It was lovely, and I would TOTALLY make this again all the time. But, in a pinch, I'd probably just pressure cook the thighs for 6 minutes, til they are fantastically tender and juicy, and perfectly done, and then shred 'em and toss 'em with some nice-quality, store bought tomatillo salsa.  Just sayin'.  It's probably pretty close.  And takes just a fraction of the time.  Though nowhere near as fresh and authentic, but...it would work when pressed for time.  (I'm sure all my sweet little honorary Latin American Abuelas (Grandmas) out there are closing their eyes, and shaking their heads right now.  Yes, I know dear Grandmas, it's just not quite the same.)

If you have a pressure cooker, count yourself blessed!  It's a HUGE timesaving device, and honestly, I think it makes the tenderest, juiciest chicken ever...every bit as juicy as a stoneware baker.  Brilliant.  So if you have a pressure cooker, pull it out and use it man! 

People are always a little scared of pressure cookers...probably the result of some sort of scary urban legend that circulates, about pressure cookers blowing up and painting the kitchen ceiling with pea soup.  Maybe back in the day, but modern pressure cookers have built-in safety features to prevent that sort of thing.  So no garage sale specials on this appliance, my friends.  If you're going to get one, splurge on a brand new one--stainless steel, not aluminum, and go 6 quart size at least so you can make enough food to make it worth your while.  (Please note that a pressure cooker is not the same thing as a pressure canner.  A pressure cooker is a pot...a big saucepan, for cooking food in directly.  A pressure canner is for canning food in jars...like green beans and corn.  I mention that because there are a lot of pressure canners on sale right now in the stores, because it is canning season.)  Read the instructions carefully.  I also recommend getting yourself a great resource book on the subject of pressure cooking, with helpful time charts in it, like: Miss Vickie's Big Book of Pressure Cooker Recipes.

It takes 6 minutes of actual cook time to perfectly cook 6 chicken thighs in the pressure cooker.  Personally, I just put them in the bottom of pressure cooker and add 1/2 cup water.  Secure the lid, bring up to pressure, and cook 6 minutes.  Take it off the heat, and let the pressure drop naturally.  When the pin drops and it's safe to open the lid, I carefully open it, take out, check for doneness, and shred the chicken thighs with two forks.  Best chicken.  Evah.

I'm going to spend an hour this week just simply pressure cooking up some chicken thighs.  I need those.  Already cooked.  It helps dinner get done on busy nights.  I'll make some freezer burritos with some of them, toss some with tomatillo salsa, and bag and freeze it for quick tacos or tostadas, or salads...and some I'll just bag and freeze plain for fast soups.

But to wrap up the "Shredded Tomatillo-Chicken Filling" review:  Loved it.  Love the book.  But I wouldn't do it every week.  Just when the pepper and tomatillos are irresistably ripe at the farmers market, and when I have the inclination to do something fun and authentic.  As I said, we are all HUGE fans of all kinds of Mexican and South American foods, so I will certainly be putting this recipe into the rotation.  It really isn't a lot of work, and it is very fun to do.  But, sometimes, I'll probably go the  jarred tomatillo salsa route, and we will be happy with that too. 

*UPDATE:  Ok, so after letting this sit in the fridge overnight, I have to take back what I said about taking a shortcut sometimes.  I just can't.  It's was too good.  I mean, it really was.  Instead I am going to try to streamline the process by roasting and processing the peppers, then bagging and freezing.  Then, hopefully, I will be able to just thaw, and pour over chicken thighs and slow cook for a quick version.  I am going to buy tomatillos, peppers, etc. to do up about 6 batches for the freezer this weekend, and we shall see how that goes.  


Sunday, September 1, 2013

#13 Autumn Apple Pear Sauce

Well I have to say, this whole testing-52-slow-cooker-recipes-and-blogging-about-it thing is full of surprises.

Yesterday I made "Autumn Apple Pear Sauce", from Healthy Slow Cooker Cookbook, by American Heart Association. 

Going into this recipe, I would have guessed it would have turned out to be one of my ultimate favorites.  Umm, well, it wasn't, really.  It was kinda so-so.

The recipe is a super-simple apple and pear sauce, just exactly what you'd expect.  It called for 3 to 3 1/2 lbs of apples and pears, some sugar, some lemon juice and a couple of autumnal-type spices.  I substituted 1 1/2 T. of Sucanat (dehydrated cane juice) for the 2 T. of sugar called for in the recipe.

In all fairness, I may have messed this one up.  It was supposed to cook 5 hrs on low.  At 5 hrs it wasn't quite where I wanted it yet, but we were going in to town, so I added (too much) water, to make sure it didn't go dry and end up as apple-pear BUTTER before I got home.

When we got home it had been 7 hrs.  Eh.  It was ok.  Still too watery.  So I cranked it up to high and took the lid off to try to get it to reduce for a 1/2 hr., so 8 hrs total.

Personally, I thought it was WAAAY too sweet.  I used Gala apples and Starkrimson pears.  Next time I would omit the sugar, use tart-er apples only, and omit the pears.  That is, if I were to ever make this one again, which I probably wouldn't.

Strangely, my family really liked it though.  My hubby really liked the pear flavor about it. Another family member said it needed a "crust", like pie or pastry.  I did not like the texture at all, but I'm going to just heat it up and serve it as waffle topping tomorrow, and that should actually be a pretty good use for it.

It just wasn't the chunky, perfectly textured applesauce my little heart desired.

To bottom line it for you:  I would not make applesauce this way again.  I am going to stick to Golden Delicious apples, and do it on the stovetop, like I always have before, in a huge stock pot, instead of a slow cooker.  No added sugar.  I don't usually eat sugar, so things that are sweetened, or have concentrated fruit sugars, tend to taste extremely sweet to me.  Sickly sweet.  Not in a good way. 

I will say this; the house smelled splendid.  Very fall-ish.  Very...September.   And that alone was a very good thing.  It helped me stop mourning the end of summer, and start moving on, mentally, into fall. 

I always have a hard time giving up the laid-back, non-schedule of summer, and it's just unnervingly quiet around the house during the day once school starts.

Sniff.  I'm  ok. 

Still going to have one "kid" with me during the day. 
She doesn't talk much though.