Thursday, November 28, 2013

Crock-y Thanksgiving!


This is what happens when you only roast ONE turkey per year: yesterday when I went to brine my bird, I took the neck out of the cavity and thought "wow, is that really all the giblets?" and went on my merry way.  Well...after 24 hours of brining and 3 hrs in the oven, guess what I discovered stealthily hidden away in the OPPOSITE end of this gigantic bird?  You guessed it.  A fully brined and thoroughly roasted packet of additional giblets.  Nice. 

But...we ate it anyway...the turkey, not the giblets.  And it was pretty good.  Most importantly, it's my gift to myself, after days of prep work, and gazillions of dishes...AHHHH!  No cooking for Mama tomorrow. :)  Or the next day...unless you count tossing all those leftovers into a wild rice and turkey soup...then maybe a nice shepherd's pie...and so on.  I'm gonna drag this thing out as long as humanly possible.

Last year I made myself a handy-dandy little Thanksgiving binder which includes: a "to-do" list (starting the first week in November with ordering fresh turkeys, but really picking up speed the 4 days before the big day, with everything from table decorations to linens, cleaning, dishes and silverware, and of course the food), shopping lists, all my Thanksgiving recipes and notes, and even a schedule for proper timing of the food on Thanksgiving day.  I can't tell you how useful this binder was!  Why did I not do this YEARS ago?!  I've been re-inventing the wheel on this thing every year, but no more!  I believe this was the most organized, and least stressful Thanksgiving I've ever hosted.

Here are some table decorations I made...little votive candles wrapped with scrapbooking paper, cardstock, and organdy ribbon.

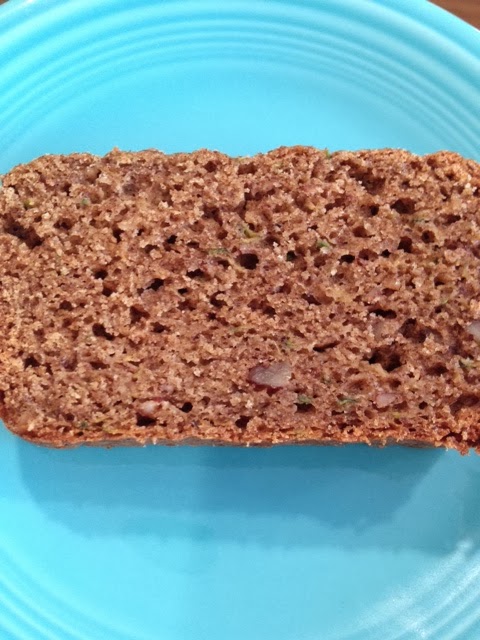
Yesterday I did housecleaning in the morning, and in the afternoon I made homemade cinnamon-ginger-orange cranberry sauce, carrots cooked in garlic and chicken stock, baked gluten-free and GF/DF bread, and made the honey mustard vinaigrette for the spinach salad with craisins and pecans.

The carrots were fabulous.  I will do them like this from now on I think:

  • About 20 carrots, peeled and sliced diagonally about 1/4" thick
  • 1 1/2 c. chicken stock
  • 1 clove of garlic, pressed

Cook in 6 qt crock pot on low 3 1/2 hrs til tender.
Remove to storage container.  Refrigerate.

The on the day of...2 hrs. before serving time:
Put the carrots into a crock pot, turn on "high", add:
  • butter, salt and pepper to taste. 
Stir a few times.  They are the perfect temp and texture at serving time.

Mashed potatoes...I made them early today, then kept warm in crock pots until serving time.

Turkey...after it was roasted, rested, and sliced I put it in a 6 qt crock with some chicken stock to keep warm until serving time.

This year, instead of dirtying all those serving dishes and platters, I just set up a crock pot buffet and that worked SO well.  It took a lot less time than passing all those dishes and created a lot less chaos in my opinion.  Super organized and efficient.

Three out of the SEVEN crock pots that kept all of our food hot!
 

I learn new things every year.  Next year, the thing I hope to learn is how to remove the giblet bag PRIOR to cooking the turkey.


Turkey hangover.

Thursday, November 21, 2013

Blueberry Apple Crisp (gluten free, dairy free, and freezer friendly) UPDATED 12/5/13


Well, in an intesting turn of events, it seems that we now have one more family member with a food allergy.  Hubby has been dealing with some dairy issues, off and on, for quite some time.  A long time ago I suggested doing a 30 day dairy elimination challenge, just to see what would happen, but he wasn't ready yet to consider that possibility.  However last week he was finally driven over the edge into readiness.  His body is trying to tell him something.  So dairy-free challenge; here we come! 

Three days in and his issues are subsiding, so hallelujah for that.  He's all in for the full 30 days.  After that time, when the dairy has completely cleared his system, he will try to re-introduce it and see what happens. That will let us know definitively.  On the one hand, that would be awesome if we were finally able to uncover the root cause of the problem.  On the flip side, entertaining the idea that dairy might not be his friend, in fact, it might even be his arch enemy, has been difficult, and there are a wide range of feelings associated with that. 

Strangely, I never had a single moment of grief or loss when I found out what gluten was doing to me.  In fact I was SO grateful to finally uncover the root cause of ALL my health issues (painful, cyctic adult acne, autoimmune thyroid disease, anxiety, irrational fears, GI and abdominal issues, joint pain....I could go on all day) that I felt nothing but pure JOY to be able to live a healthy life, free, once and for all, of all these ills, simply by saying good bye to gluten.  It was not a tearful, regretful parting, but more of a "good riddance!  Get the heck out of my life forever!" type of parting.  I was like: "Later Gluten!  Don't let the door hit you in the butt on the way out!!"  No looking back.  No sorrow, or feelings of loss--nothing at all, except gratitude.  I never knew what it was like to be well before.  These last 3 1/2 years gluten-free have been a whole new life, better than I ever thought possible--thank you Jesus! 

But not everyone feels the way I did when they discover a food allergy.  Most often it's grief stages of shock, anger/irritation, feelings of loss, sadness, and finally acceptance.  So I'm really going to try to baby my Hubby through this process with some fantastic, yummy, dairy-free food that he will love, and that, more importantly, will love him back.

Quinoa Apple Crisp
The recipe I used is from Ali Segerston and Tom Malterre's excellent book, Whole Life Nutrition.  But it is similar to one found on their website right HERE.  I used more fruit:  5 or 6 apples and a cup of frozen blueberries...I used only 2 T. sucanat in the apples, and 1/4 c. sucanat in the topping, for a 9x13 pan.  And it was plenty sweet.  I used double the aarowroot and lemon juice, and only 1 tsp cinnamon plus spice blend.  I omitted the vanilla, and added 3/4 c. chopped walnuts.


I chose this recipe because # 1 my hubby loves apple crisp, #2 I've STILL got a ton of apples to use up!  Gluten is found in wheat, rye and barley, but also in oats...even certified GF oats can be a problem for most gluten intolerant people.  I've tried soaking and everything to be able to eat oats, but the bottom line is I just can't eat them.  Even GF oats are a huge problem for me. Oats have a very similar protein to gluten.  So similar my body reacts almost the same as if it were gluten.  So, I substituted quinoa flakes.  They tasted pretty good, but (sigh....) my body was still not a big fan.  So next time, we'll probably just go with a nut-only topping.  If you can eat oats...hooray for you!  This recipe is divine with oats, so go for it, and eat some for me, ok? ;)

You know me...as long as dishes are dirty, I'm darn well gonna make 'em work for me!  Instead of just one apple crisp I went ahead and made 3--the extra two I made into apple crisp "kits" for the freezer.  The blueberries are local...I froze them in season when they were ripe, cheap, and full of summer sunshine.  Oh how I love reaping the benefits of that now that it's cold and bare outside!  However, now I may have to re-do the topping to be nut only, but at least the apples are done and ready to thaw and bake.  I have never frozen apple crisps before, but I see lots of freezer recipes for it, so I'm guessing it will work.  I think these kits will be nice to have when we have company, or maybe over the holidays.  One less thing to mess with.

Here are the apple mix, blueberries and topping, bagged separately...

I grouped them all in another ziplock with instructions written outside to make it easy when I go to use it. 
  Yes, I know that's a lot of bags, but personally, I will wash and re-use the blueberry and outer bags.  And I do rinse and recycle the others, unless they've had raw meat in them, and then they do just need to be thrown in the trash.  I'm working on making freezer cooking more sustainable, but sometimes the ziplocks are just plain unavoidable...I'm not a fan of aluminum pans.  But I do use freezer boxes for some things like soups and broths, and they work great.

*UPDATE 12/5/13:  Well I thawed one of these freezer kits in the fridge, then dumped it in a 9x13 and baked it up.  It has benefits and drawbacks.  Benefit:  It took about 10 seconds to have this dessert in the oven!  Open bags, dump into pan.  Drawback:  the apples were a bit soft in texture for my taste.  There was definitely a difference that I could tell.  The fresh version apples were firmer more "al dente", and the texture was just better in my opinion, but the flavors were all the same--I could tell no difference in the topping or blueberry aspects.  The softer apples in this frozen version were not too big a deal.  Especially if you are serving this with ice cream, then it probably makes no difference what-so-ever. 

Wednesday, November 13, 2013

Freezer cooking through the week

Finally, a week with a little bit of wiggle room.  I'm taking advantage of those couple of calendar days that are ahhh, ahhh! (angels singing) EMPTY. 

Don't you just love it when you look at your planner and see a day with NOTHING written on it?  I had a couple of those this week.  Although, there is still the usual daily stuff...meetings, lessons, etc., but otherwise free.  That just looks like some prime time to get ahead for the month.  It's especially important this month...with hosting Thanksgiving and all the holiday stuff starting to ramp up, I'm giving myself the gift of a few nights off kitchen duty. 

Here's the plan: 

Day 1:  Chicken day.   I started out the day with shopping trips.  I bought 6 lb ground beef, 4 lb stew meat, 6 lbs chicken breasts and 4 lbs chicken thighs.  My word that's a lot of meat!  Bought it at our local butcher shop, and paid $94.00 for everything.  Then I bought all the other items I didn't already have at home to complete my recipes. 

With not much time left in the day I came home and made all the breast meat into breaded chicken strips (using this GF recipe).  Then I had enough time to trim up the thighs, which had a TON of extra fat on them, and add the other ingredients into the bag for a big crock pot of Lime Salsa Chicken

So by the end of the day I had last night's dinner, 2 more chicken strip meals (at least!), and at least 2 meals of lime salsa chicken into the freezer.

Before bed I started 3 lb of walnuts and 2 lb of pecans soaking....

Day 2:    Beef day.  I drained and rinsed the nuts this morning right after making breakfast and lunch and sending everyone packing.  Tossed them (the nuts, not the family!) onto the dehydrator trays, set the timer, and now I don't really have to think about those again til tomorrow when I will simply bag 'em and freeze 'em for holiday baking and snacks.

After two cups of coffee and goofing off on the internet for 30 minutes (yes, I have to set a timer...) I started in on the beef stew.  With 4 lbs of meat I was able to make 2, 6 qt. crocks full.  So one crock is bubbling right now on each side of my kitchen island.  (An excellent example of why in the world I would need TWO 6 qt crock pots!).  One pot will be tonight's dinner and the other bagged up and frozen for two more dinners later. 

I think red wine and mushrooms totally MAKE a beef stew, don't you agree?

Clean up round 1.  Then on to that 6 lb of ground beef.  I used my 12" stainless skillet to brown 3 lbs at a time.  Made taco meat out of 3, and Italian Beef for Italian Sloppy Joes out of the other 3. That didn't take long and there was ONE skillet to clean.  Let me repeat that: ONE.  Six dinners, one skillet to clean...that makes me a happy girl.

I'm about to attempt filling my other dehydrator up with apples before I have to be in town to drive for pick up and piano lessons...we'll see if it gets done in time.

Day 3:  I only have one more free day and that's Friday.  Here's the plan for that day:  Fish and Turkey.  I'm going to make 4 lb of fish sticks, and 2 lb of turkey meatballs and 2 lb of turkey burgers. Cost for fish will be about $20. and turkey $30.

So here's the breakdown:  By Friday night I will have banked about 16 meals, not to mention all the meals we're eating as we go.  Total cost = $144. in meat.  Including meals we ate along the way that breaks down to $6.85 per meal in meat, roughly--give or take leftovers for lunch the following days.  That is for 28 lbs of meat, I'm figuring about 1 1/3 lb per meal.  So calculate how much meat you use per meal for your family and that could be more or less...if there are just two of you this menu could go a lot further, not as far if you have a bigger family, or large eaters.

Tomorrow my oven should be fixed so I'm going to try to slip in a couple dozen zucchini muffins, as those are so nice to toss in the lunch, or eat for afternoon snacks. 

So by Friday I should have banked in the freezer :

3 taco meals
3 Italian beef meals
2 lime salsa chicken meals
2 (at least) chicken strip meals
2 (at least ) fishstick meals
2 (at least ) turkey burger meals
a dehydrator load of apple chips
2 lb of pecans, ready to use
3 lb walnuts, ready to use, and
2 dozen (at least) muffins!!!

Can I get a whoop, whoop!??  Score, friends!  I'm so excited.  Can you tell?  That's 14 meals I won't have to cook.  Now I'm really rolling, and these three days are not even full-on freezer cooking days, but just a few hours extra cooking, not the entire day-- just about double what I would normally be doing anyway, just making dinner...but it pays off WAY more than double.

Here's a very important tip regarding freezer cooking:  when you finish making your food get it into the fridge right away so it can start cooling down as quickly as possible.  Do not try to bag up hot food for the freezer.  Wait until it cools completely.  Otherwise you will get more icy crystals in your food as it freezes which just doesn't do the quality of your food any good at all.

Sunday I'll be making my next freezer cooking plan:  4 chicken, 4 beef, 4 fish and 4 turkey, plus baking.  Hoping next time around I will have whole days to devote and this will only take 2 days to do over 2 weeks worth of cooking.

What are your favorite things to make for the freezer?  Let the commentary begin!


Thursday, November 7, 2013

Open-Faced Italian Sandwiches (for the freezer!)

Many years ago I showed up at a parent/teacher conference for my (then) second grader.  On the wall I noticed the comparison/contrast paragraphs written by all the students:  "My Most Favorite Meal" and "My Least Favorite Meal".  I quickly located my child's work and read "My least favorite meal is my mom's sloppy joes that she makes with spicy buffalow sauce."  Huh??  I had to wrack my brain to try to remember ever making sloppy joes with...buffalo sauce??  The teacher had been wondering about that interesting combination too.  We had a good laugh over it, and the take-away message was clear...my sloppy joes, while not actually made with any sort of buffalo sauce, were apparently a bit too bold for young palates!

Funny thing is, I had no clue that this child disliked sloppy joes!  I had served them many times and never a word was spoken about it.  This is a kid who is super flexible, resilient, and full of uncommon, rock-solid good sense, coupled with a sweet and uncomplaining spirit.  Oh thank you Lord, for this child, who is SO the opposite of myself that we are a perfect match!

So in honor of this child's aversion to sloppy joes, I made an Italian variation tonight, open-faced, on gluten-free hamburger buns, with mozzarella melted on top.  No "spicy buffalow sauce" in sight.


Open-Faced Italian Sandwiches

This recipe comes out of a book I bought recently, The Everything Freezer Meals Cookbook, by Candace Anderson, with Nicole Cormier RD.  This book is full of pretty basic family fare.  It contains some recipes that call for things like cream of _______ soup, but, I can overlook that, make my own substitutions, and just glean the good stuff.  And by good stuff, I mean quick, simple, basic, healthy food that I can make ahead and then take some nights off kitchen duty.  And for that I am truly grateful.  Leaves more time for blogging. 

This recipe is located HERE, so you can read it in it's entirety.  I doubled the tomato paste and water--the way it was written was a bit "dry".  I wanted the meat a little saucier.  And it needed salt and pepper.  And I changed the procedure a little bit.  Of course, I subbed in gluten-free hamburger buns for the Italian bread.  Here's my version:

1 lb. ground beef
2 T. onion chopped (I also threw in some finely chopped yellow peppers, about another 2 T)
2 cloves garlic, pressed
2 tsp. Italian Seasoning
1/4 c. tomato paste
1/2 c. water
3 to 4 hamburger buns (both tops and bottoms, so 6 to 8 halves)
cream cheese (I love Nancy's organic cultured cream cheese)
mozzarella cheese

Preheat oven to 400 degrees.

Drizzle a little bit of oil in a stainless steel pot or skillet with sides, sauté onion, garlic, and pepper for just a few minutes until soft.  Add tomato paste, water, Italian Seasoning, and salt and pepper to taste.  Stir to combine, then add in 1 lb of cooked ground beef (that you oh-so-conveniently cooked and froze at an earlier time, then thawed in the fridge overnight).  Stir and heat through.

Split your hamburger buns into halves and toast in the oven for just a few minutes, like 3 to 5 minutes.  Remove and carefully spread a thin coat of cream cheese on each half.  Top with beef mixture. Sprinkle with mozzarella cheese.  Return to oven until cheese gets all melty and slightly bubbly, about another 4 to 5 minutes.  Serve and enjoy!

These sandwiches went over big at my house.  I tried to come up with a clever Italian name for them, but wasn't that creative; my hubby says we can still just call them sloppy joes, only we need to say it with an Italian accent.  He said these need to go into a weekly rotation...not monthly; weekly.  Yeah, they were good.  Really good.  And super fast.  My plan from now on is to multiply this recipe by 4 or 6. As long as I'm cooking up ground beef for the freezer I might as well add in the tomato paste and seasonings before bagging it up.  Then next time all I will have to do is thaw the bag, top the buns and have no dishes to clean except the baking pan.  Uh, SCORE!!!?!  The original recipe offers another freezing option, and that is to fully assemble the sandwiches, wrap in foil, and freeze.  Then they go directly into the oven for a super-simple lunch or dinner.  I may try that technique too.  That way hubby could take them to work and pop them into the little toaster oven he has there.

I served these sandwiches alongside some baby carrots leftover from my party the other night--I just cooked them in chicken broth, and added in some frozen peas.  It was filling, simple, and delicious.  This menu is a total keeper.


Wednesday, November 6, 2013

Pumpkin Spice Lattes, in the Slow Cooker

Last night was my turn to host my stamp club (rubber stamping: card-making, scrapbooking...). 

I was thrilled to get November as my month, because as soon as I heard the date just one thing popped into my head:  Pumpkin Spice Lattes in the crock pot. 

You know my crocks...they love a good party.


I had never made this recipe before, but I've been eyeballing it for years, just waiting for the appropriate time.  Thanksgiving seems like a good time, but in all actuality, I'm usually too busy to worry about fun drinks on Thanksgiving.  Roasting the turkey, and making the carrots, potatoes, salad, bread, cranberry sauce, along with all the other details of hosting are pretty much a "full-plate" for me, (if you'll pardon the pun).  So I always do ice water with lemon, store-bought sparkling cider, and coffee on Thanksgiving.  Besides, who needs all the extra milk and pumpkin on a day that is already pretty darn calorie-loaded? 

But a little party like my stamp club night...perfect.  It's just enough of a fun and fancy treat.  Along with the pumpkin lattes I served a veggie tray, beef stick and cheese, artichoke spinach dip (store bought at Costco, and kept warm in my 2 qt crock) GF crackers, apples, and some chocolate covered super-fruits: blueberries, cranberries and cherries.

The Pumpkin Spice Latte recipe I used comes from Stephanie O'Dea.  It's on her website HERE and also in her first book Make it Fast, Cook it Slow.  *(11/7/13 UPDATE: On Stephanie's blog she notes the importance of using 2% or lower % milk to avoid curdling (new info to me!) and this is key...don't let the milk boil.  Keep an eye on your crock if it tends to get hot enough to boil.  I also noticed that this drink re-heats WAY better the next day in a pan on the stovetop (while stirring), and not in the microwave--it tends to burn and create a really nasty "skin" on the surface if re-heated in the microwave.  I made a WAY bigger batch than Stephanie's recipe, and changed ingredients to eliminate the refined sugar.  I also reduced the spices and vanilla pretty significantly.  Stephanie's called for 2 T (!) of vanilla, for a recipe that only serves only two people!  Seemed like way too much vanilla and spice to me...  So here's my version, made for a crowd. 

Pumpkin Spice Latte

This recipe uses a lot of milk, so if you are serving about a 1 cup amount it would probably serve 16 people.  I served about 8 people, and it looked like the crock was still full!  I have tons leftover in the fridge...in fact I'm sipping a cup right this very minute!  Along with a piece of gluten free toast, covered with butter and honey...sigh.  Life is sweet.

10 cups milk of your choice (I used organic dairy milk, but I bet almond milk would be lovely too...)
1 cup canned pumpkin (not pumpkin pie filling, just plain pumpkin)
3/4 c. pure maple syrup
1 T. vanilla
4 tsp. pumpkin pie spice
6 cups strong coffee (I just brewed 6 cups in my keurig--you might want decaf if you party is late in the evening...some people can not have caffeine that late in the day...)
2 sticks of cinnamon.

(*SEE 11/7/13 UPDATE IN BOLD ABOVE...)  Combine pumpkin, maple syrup, vanilla, pumpkin pie spice and about 2 cups of milk in a blender. Blend until smooth.  Add the pumpkin mixture, coffee, and the rest of the milk into a 6 qt crock pot.  Float two cinnamon sticks on top.

Cook on high for 2 hrs, then turn down to "warm". 

Remove cinnamon sticks.   Stir before serving, maybe even (carefully!) put an immersion blender  in there for a few seconds (making sure you got the cinnamon sticks out first, of course!).  The pumpkin tends to settle on the bottom and the spices float to the top, so you want to get it all mixed up again. 

Caution when serving; this will be very hot!  Mine was about 160-170 degrees coming out of the crock pot, so I let it sit a minute in the cups til it came down around 130 degrees before serving it, which is the "sweet spot" as far as coffee temp goes...in my humble opinion. 

This latte is slightly sweet, spicy and very "real" tasting, unlike a lot of coffee-shop pumpkin lattes that are flavored with pumpkin "flavoring" instead of real pumpkin.  Using the maple syrup, and eliminating the refined sugar makes for a really "clean" finish--none of that nasty sugar aftertaste.  This beats any coffee-shop latte hands down, any day of the week, and twice on Sundays!

Pumpkin it up dudes.

 Two Christmas cards I made last night...


Tuesday, November 5, 2013

Slow Cooker Taco Soup

*Just to update you on the crock pot baking post...I repeated the experiment with pumpkin bread, and it turned out fantastic.  Next up, I'm going to try cranberry orange bread and if that works, and if I can get the recipes all adjusted how I want them, I will post them.  But I think I comfortably state that baking quick breads in the crock pot is very successful.  I'm pretty sure any good recipe you have will work using the crock pot baking technique.

Ok, on to today.  As the title implies, it's a busy day. So this will be a quick-and-to-the-point post, and may be lacking in witty repartee. :)

I don't know about your house, but around here there is at least one weeknight every week where people are on different schedules--late home from work nights, dinner-time meeting nights, Bible study nights...there's always something.  And on those nights we usually end up having snacks in the afternoon and then eating dinner late, like 9:00 pm.  We're late dinner-eating people anyway, usually between 6 and 7, so trying to eat dinner at 5:00 just doesn't work for us. 

Soup in the crock is quite forgiving and flexible...it doesn't mind waiting on us.  So taco soup is warming on the counter as we speak.  If people who are home earlier want to eat, they can, and for those arriving at 9:00, and or those who choose to wait for everyone to arrive home...well, at least it's just one crock to clean.  Bowls go right in the dishwasher, and Mama's not standing there til 10:00 doing dishes.  It's a win no matter how you look at it.


Taco Soup

Is there anyone who hasn't made taco soup before?  It's certainly not rocket science.  Basically, if you have hamburger cooked, bagged up and frozen, and you have some cans of beans and canned or frozen tomatoes, and some frozen onions and peppers, well...you're all set.  This is where you get to reap the rewards of stashing some goodies away in the freezer.  If nothing else, just get yourself several pounds of hamburger--brown it up, cool it, bag in freezer bags and toss 'em in the freezer.  You'll thank me when a busy day comes and you can throw dinner into the crock in about 3 minutes flat.  The seasonings in this soup are your basic pantry staples: taco seasoning and ranch mix.  I just googled "taco soup" and came up with this recipe, then of course, proceeded to change it.  Here's mine:

1 lb. cooked ground beef
15 oz tomato sauce
1 14 oz can fire roasted tomatoes with chilis (Muir Glenn)
1 can kidney beans (drained and rinsed)
1 can black beans (drained and rinsed)
1 small can sliced black olives, drained
2 c. beef broth
2 1/2 "cans" of water--use the empty fire roasted tomato can...)

1 clove garlic, pressed
some chopped onion  (1 medium onion) and bell peppers (about 2 cups) that you froze earlier! :)

3 T. (or one packet) taco seasoning
1 tsp. dry ranch dressing mix (I make my own, HERE, or I use Simply Organic brand ranch dip mix from Fred Meyer)

Directions:  Take your onions, peppers and garlic and drizzle with a bit of oil, stir, and then microwave for about 2 minutes.  Combine this mixture with all the other ingredients in the crock pot.  Cook on low about 4 hrs.

Serve with sour cream and chopped avocado or a dollop of guacamole, on a bed of crushed corn chips.  This soup may need salt, but taste first because the corn chips will add salt. 

*Be sure to check out the link above for that ranch mix--You may not want to use the big national brands or ranch mix they have in the stores salad dressing isle, because they usually have MSG and other stuff you may not want in them.  Making your own is easy and economical, but the Simply Organic brand is really good too, and hey, it's done, and quick to tear open a pouch on a busy day, know what I mean?  I typically make my own taco seasoning too, but this time I used bulk taco seasoning I bought at Costco.  The link for the ranch dressing mix also includes recipes to make your own pumpkin pie spice, onion soup mix, etc.  I haven't tried those yet, but  I can vouch for the ranch recipe; it's great.


Friday, November 1, 2013

Zucchini Bread in the Crock Pot--SUCCESS!!!

You knew I couldn't leave this baking-in-the-crock-pot thing alone, right? 

Well, yes.  Success!  I did it! I baked a loaf of zucchini bread in the crock pot!

I used my 6 qt. oval crock pot, with an 8" glass loaf pan nestled inside. 

I made a ring out of aluminum foil to set under the loaf pan for even baking.


I made a gluten free zucchini bread recipe (more on that in a minute...) and set the loaf pan on the foil ring.


Next I laid a layer of about 4 paper towels (to catch condensation) and a bamboo skewer (for ventilation) under the lid.


And I baked the bread, on High, without any peeking for 2 hrs and 15 minutes.  I think it might have been done right at two hours though.  It looked a little more "damp" in the middle even when it was totally done, so that can be deceiving.  Test with a toothpick. 


Voila!  Isn't that FUN?! 

Something about baking this bread in the crock gave it kind of a really nice "crust" on the outside.  Everyone liked it a lot.


Here is my only caution:  I "pre-heated" my crock by turning it on high while I mixed up my zucchini bread batter, and then I wasn't very careful when putting the loaf into the crock to bake.  I burned my finger on the outside of the hot crock pot.  So I think next time I will just set it in the cold crock, and turn it on high after I set the pan in.  I do not think it will alter the cook time very much.  Do be sure to use oven mitts when you remove your loaf from the crock.  Treat it like a hot oven, because it can definitely burn you.

I think, truly, any of your favorite quick bread recipes will work with this technique.  I used a recipe that I am currently developing.  It is not perfected and ready to share yet, but no fear; when it is ready you will be the first to know!  It's a GF zucchini bread with buckwheat, hazelnut flour, and sweetened with honey and applesauce; no refined sugar. I will make it dairy free too.

So once again, this begs the question, why would  a person want to bake in a crock pot when they have a perfectly good oven?  Well...aside from the WAY fun and cool factor, I can think of several reasons and occasions when I will be using this technique.  Right now for instance, my oven is broken, and will not be fixed for at least a week.  When you have food allergies your choices are typically limited to: 1. make it yourself or 2. do without.  I can certainly do without zucchini bread for a week, but, goodie!, now I don't have to.  Other reasons:  When your oven is occupied with other things (holidays), when you want to bake something but you need to go run an errand or get something else done for a few hours, when you are camping, or oh!!  Here's a fun one!  At work, or in a church fellowship hall, or a classroom, or somewhere else you might want to bake sans oven.  (Remember to keep out of reach of little ones though...those crocks get HOT, people!  Not only inside, but the outside gets VERY hot and can definitely cause burns, as I discovered today.) 

I know I've mentioned this before, but I read a cute little book this summer by the pool: "Tips for Using Your Slow Cooker", by Phyllis Pellman Good.  Oh my goodness what a fun little thing.  It was not recipes, but more like a round-table discussion; people's comments on how they use their slow cooker--everything from holiday and party ideas to food they make, to bizarre places they use a slow cooker, like in the car!?  And in hotel rooms??!  One large family took a very budget-restricted trip to Disneyland and ate all their meals in their hotel room using a slow cooker.  Now, for the record, let me say this, I gotta draw the line right there.  When I go on vacation, Mama's NOT cookin'.  Because if Mama's cookin', it's not a vacation for her!  But I do have to say that it did make me think a little more out of the box in terms of how I can utilize my slow cooker.  And for some bizarre reason I love books like this little one...luv to hear what people are doing and making; all their stories and experiences with their crock pots, and other pieces of kitchen equipment for that matter.  For instance, right now I'm really intreagued by those electric "roasters"...they are like a huge, gigantic rectangular crock pot.  People make turkeys in them, and massive amounts of food for huge parties.  So if you have one, please, please tell me what you do with it, and if you've ever done a turkey in one, and how it turned out.  Call me nosy, but that sort of thing always interests me.

So.  If you do any baking in your crock pot you MUST tell me all about it!  Better yet, send pictures.

UPDATE: 11/5/13
*Just to update you on the crock pot baking post...I repeated the experiment with pumpkin bread, and it turned out fantastic.  Next up, I'm going to try cranberry orange bread and if that works, and if I can get the recipes all adjusted how I want them, I will post them.  But I think I comfortably state that baking quick breads in the crock pot is very successful.  I'm pretty sure any good recipe you have will work using the crock pot baking technique.