Friday, September 27, 2013

Veggie Packed Meatballs and Spagetti Squash


Where we live there's a sweet little lake.  It's one of the things I love best about living here.  Nearly every day my dog and I go out to check it out.  The lake and surrounding area inform me about what's going on in the world.  No, it does not inform me about things like political scandals and multi-million dollar Hollywood divorces ...I mean the REAL world...things like the weather, and the seasons.  The color of the water, and the texture of it's surface tell me about the wind and the sun.  The big leafy trees along the edges tell me about the slow but steady and constant changing of the seasons:  I love the hopefulness of tiny new buds that pop up just when you are wondering if it will ever be warm again, followed by a vibrant time of bright green leaves.  Then comes this time of year, when every day it's something different...slightly lighter green, to pale yellow, to golden, to red and brown...then a big wind, or the first snowfall will come, and we'll be heading in to the season of bare crackly branches, encased in ice.  Even then, you'd be shocked and amazed how much LIFE there is around the lake, even in the dead of winter.

Year round the wildlife here thrills me.  I love watching the ducks (such conscientious little parents) as they dutifully, fastidiously, raise their fuzzy babies into that awkward summer adolescent stage--half fuzz, half fathers--and finally on to maturity as fall approaches.  We get big herons here, eagles (one time a huge golden eagle came to perch on our front porch!) bright blue Stellar jays, quail, woodpeckers, pheasants, rabbits, racoons and turtles.  Once, many years ago, a young bear even came walking down one of the streets in our neighborhood!  Someone caught a picture of it.  It made the front page of the newspaper.

Yesterday was a day I've been looking forward to for weeks...the first of the HUGE Canadian Geese started arriving.  They stop here every year to rest up, preen, eat, and gather strength to continue their migratory path to Florida, or wherever they are heading, to wait out the snow and the cold.  I saw a flock of 12 along the shoreline, and heard their honking conversations with one another.  By this time next week I will start to see their V shaped flight patterns regularly throughout the day.  Sometimes they are so low overhead I can actually hear the wind rushing through their feathers as they skim right above my dog and me.  The lake is my "homepage" on reality.

The end of September, my friends, is squash time.  And nothing goes better with spaghetti squash than meatballs.  Now, I have a beef with meatballs (if you'll pardon the pun!).  In my opinion, meatballs really need a carb-y binder, such as breadcrumbs or oats.  Without that, they are hard, like little tough golfballs.  So the paleo (grain-free) meatball recipes I've found, while I LOVE the addition of veggies, have left me wanting.  However, the traditional carb-filled meatballs can be dicey for me, digestively.  Both gluten free breads, and even certified gluten free oats can cause me trouble.  So what to do?  Somehow I needed to combine the tender bite of a carb-y meatball, with the veggie power-punch of a grain-free meatball.  Enter:  soaking the oats. 

I've read that soaking grains in water, with an acidic medium, such as lemon juice, vinegar, yogurt or whey can significantly reduce the phytic acid, and sort of "pre-digest" the grains, making it much easier to actually absorb and use any nutrients the grains have to offer, while mitigating the trouble they can cause.  So I did that.  I soaked my oats overnight in filtered water, with organic cider vinegar, then rinsed and drained them, and proceeded with making meatballs. 

This is a recipe I just started putting together, so it was my first experiment with it, and I think it could use some tweaks, but I'll  go ahead and give it to you as is, and you can play with it yourself.  It was a hit; my family said that these were the best meatballs I've ever made. 

So, for what it's worth, here it is:

2 lb ground beef
1 cup pre-soaked gluten free oats (but next time I will try to reduce it to 1/2 cup)
2 eggs
1 grated carrot
1/2 grated zucchini
1/2 tsp salt
1/4 tsp pepper
1 tsp Worcestershire Sauce
1/4 tsp onion powder
1/4 tsp garlic powder

I used a medium size cookie scoop to portion the meat into meatballs, and then baked at 375 degrees for about 35 minutes, until they were fully cooked and no longer pink inside.

I know there are better meatball recipes out there, but this one was quick, low fuss, and met my criteria of being BOTH full of veggies, AND tender and juicy, AND it had a carb-y binder that did not mess with my belly...score!

I freezer tested these, and they came out beautifully.  Simply thaw in the refrigerator and re-heat, gently (I had one in the microwave, and zapped it for 30 seconds, perfect--tender and moist.  When I did one for 1 full minute it really, really dried it out and made it hard, so just reheat enough to heat through, but don't turn them into meatball-jerky.  These are IDEAL little meaty, veggie-filled packets for the  lunchbox, perfect with a container of marinara or ketchup for dipping, IF your students have access to a microwave for re-heating. 

So next time I make these, it's gonna be meatball mania--I'll make dozens and freezer, then throw 'em in ziplocks and freeze, for some super-fast future dinners.

Now for the spaghetti squash.  There's no easier way in my opinion than microwaving 'em.  Simply:

1. Wash and dry the squash.

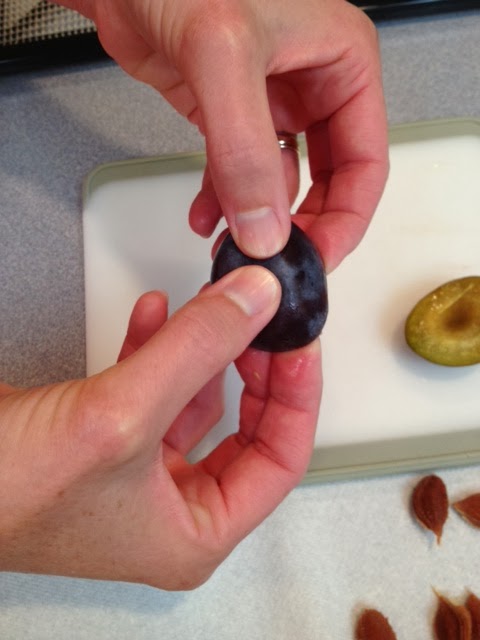
2. Use a sharp knife and poke it full of nice deep holes for venting the steam.  Be extremely careful!  Spagetti Squash are round and not very stable!

Here's me poking a hole with my right hand, while taking a picture with my left!!  Yikes...do as I say, not as I do! :)
 

3. Place the squash in a microwave-safe dish and microwave for 6 minutes on one side.

4.  Use oven mitts, or towels (IT'S VERY HOT!), to flip the squash over, and microwave another 6 minutes.

It should be getting kinda soft at this point.  If it's still rock-hard, go ahead and turn it a 1/4 turn and go another minute or two, but keep checking...don't just set it for 6 more minutes and walk off.  Especially when you don't have enough ventilation holes in it.  Or you will have a fun time of cleaning exploded squash off the inside of your microwave.  Don't ask me how I know that.

5.  Now let it sit for quite a while until it's cool enough to work with, then cut it in 1/2 and remove the seed with a big spoon.  Then use a fork to pull out the flesh of the squash--it comes out in delightful spaghetti-like ribbons, so very fun!

If you want to see a video tutorial of this process, check out this excellent one at www.cleananddelicious.com.  That is where I learned how to microwave a whole spaghetti squash, and I seriously love doing that.  To me it's just WAY easier than cutting it in 1/2 when it's hard, and spending the time to oven bake it, but if you want to do that there are oven directions under the video tutorial.

Top your squash with a few meatballs and some sauce of your choice.  This will be my SUPER-easy dinner for nights I just do not want to cook, once I get my meatballs in the freezer.  Then it's just heat meatballs, zap squash, open marinara jar, and serve. 

Voila: dinner, done.


Thursday, September 26, 2013

Breakfast Egg Cups for the freezer

Want a quick (and I mean quick) way to get some nourishing breakfasts into the freezer?  And frugally "gather up the fragments" at the same time?  Actually, these little individual quiche are not just for breakfast, but could go in the lunchbox too...or could be a snack, or even dinner in a pinch.  Last but not least of all their virtues...they are absolutely adorable.
Hi, you cute little things!
 
I've seen recipes for these all over the place, but it's pretty much a non-recipe...you just use whatever bits of veggies, meat, and cheese you have leftover, put them in muffin cups, add beaten egg, and bake.
 
This batch of a dozen egg-cups (as I call them...some people call them crustless mini quiche) was made with:
 
  • 1/2 of a shredded zucchini (use whatever veggies you have, the more the  better, fill the cup)
  • about 1/2 lb cooked ground beef (but I would reduce to 1/4 lb next time for a dozen cups)
  • a sprinkle of cheddar cheese
  • and 10 eggs, beaten with salt and pepper, or whatever seasoning you like.  (For this batch I used about 1/2 tsp salt, and 1/4 tsp pepper.)
 
 
No need to grease the pans if you have a non-stick pan...

 
Just layer in your veggies, then your meat...
 
And top it with shredded cheese of your choice.
 
These come out of the pan beautifully.


That's pretty much it.  There are some very important tricks to this though.  It took me a lot of experimenting to discover how to best make these things!  And I will be happy to share that hard-won knowledge with you, to save you the time, expense and frustration of having to make the same mistakes I've made.
 
1.  These need to bake at a relatively low temp.  I set my oven to 300 degrees.  Most recipes say 350.  But if you do that they will poof up, and then promptly FALL when you take them out...so unattractive.
 
2.  You need to pretty much fill up the muffin cups with the veggies, meat and cheese, and then you just sort of "fill in the airspace" with the beaten egg.
 
3. It doesn't take much, only about 3 T. of beaten egg per cup.
 
4.  Leave about 1/4" headspace at the top of the muffin cups, or they will overflow.
 
5.  Bake just until eggs are set, NOT browned.  I bake at 300 degrees for 20 minutes, then turn the oven off...and let them stay in the oven another 5 minutes, for a total of 25 minutes.  Then take them out, and allow them to cool somewhat before removing cups from the pan. 
 
Refrigerate your egg cups, and then enjoy the extra time to sip some coffee in the morning!  You get a yummy protein-packed breakfast, with no dishes, and no work in the wee hours, hallelujah!  Nothing better than that in my book.

If you want to eat the egg cups the next morning, just wrap them in a paper towel and microwave to re-heat, about 20 seconds or so.

I freezer tested these last night, and did a side-by-side comparison this morning:  The plate on the left is the frozen one, reheated in the microwave for 1 minute, wrapped in a paper towel.  The plate on the right is one that was not frozen, just refrigerated, and then re-heated 20 seconds.  No discernable visual difference.

Then the cut in half view, and the taste test...frozen on the left, fresh on the right.

They tasted pretty much the same, so WINNER!  These freeze just fine.  However be sure not to over heat them in the microwave, or they will get dry and shriveled.  Experiment to see exactly how long you need to do them in your microwave to heat through--could start lower than 1 minute and see how it goes.  Just make sure to let them cool after removing from the microwave...especially the frozen ones heated for one full minute.  It will be SUPER hot, and release a lot of moisture.  No burnt fingers and tongues on my watch, ok?

Next time, I will use more veggies, and less meat. This batch was really too meaty in my opinion, and kinda "heavy".  I ate both the test cups this morning and now I'm overly full.  Next time, I will eat just one, and it will be plenty!  My hubby, and anyone who is very hungry, could probably put away two of them, or maybe more, in the case of teenage boys!  But my hubby is bigger and stronger than me, and he needs the protein to fuel weight lifting (his idea of a good time...?!), but as for me, the most weight I ever lift is my 6 qt. slow cooker full of food, and the occasional 45 lb Australian Shepherd for a quick snuggle.

So what are some other possible combinations?  Ham, Swiss and peppers or pineapple?  Sausage and red peppers with cheddar?  Beef and broccoli and carrots with pepper jack cheese?  You are limited only by your imagination, and what you have in the fridge that needs to get used up.  Egg-cup on, my friends.
 

Wednesday, September 25, 2013

#19 Turkey and Lentil Soup--WINNER!!

Next up on the auction block:  One delicious pot of red lentil soup.  Any firstborns out there with a birthright to barter?

Red lentils always remind me of Esau, in the Bible, the book of Genesis.  Esau was described as "red" and "hairy", and "a skillful hunter; a man of the open country".  One day, when he came back to camp quite famished, after a long day of hunting, he sold his birthright (as the firstborn) to his brother Jacob, for...you guessed it...some bread and some lentil stew.  Now, one of two possibilities exist; either:

a.  Jacob was some kind of crazy-awesome chef, or
b.  Esau did not appreciate the value of his birthright!

We know in fact, that the answer is b.  The Bible states that Esau "despised" his birthright.  It doesn't really tell us anything about Jacob's mad cooking skills, but I'm guessing he probably knew his way around a pot and an open fire.

Now as for me...thankfully, I did not have to use a pot over an open fire to cook my lentils...just a 6 qt slow cooker.  And I'm not planning on selling my soup; I'm just going to eat it. 

Unless someone offers me the right price...then I may consider selling.  But you better hurry...it's almost gone already.  :)

I started out to make "Turkey Sausage and Lentil Soup" from Healthy Slow Cooker Cookbook, by the American Heart Association.  I have loved most everything I've made out of this book.  As long as I ignore all their "fat free" nonsense, and make my own decisions about ingredients.  I would have to say that it's one of my favorite crock pot cookbooks, because they've won my heart with all the fresh veggies.

However, in the case of this recipe, I made so many BIG, and significant changes, that actually, what I made was not the same recipe at all.  My major alterations include: using ground turkey instead of turkey sausage (and double the amount), using red lentils instead of brown, using fire roasted instead of regular canned tomatoes, I used dehydrated carrots and onions instead of fresh, and most significantly, I completely changed the spices and seasonings...and the preparation directions...and the cook time.  So basically, it's a whole different recipe. 

Here's my version, adapted from "Turkey Sausage and Lentil Soup", Healthy Slow Cooker Cookbook.

Slow Cooker  Size: 6qt.
Slow Cooking time: about 5 hrs. on low
Makes:  A LOT, about 4 quarts

Start with:

1 T. dehydrated onions (or one small or medium onion, diced)
1-2 T. dehydrated carrots (or 1/2 to 1cup fresh diced carrots)
4 c. Chicken Stock (homemade preferably, no salt)
4 c. water
1 lb. red lentils (sorted, rinsed, and soaked in water overnight--drain off soaking water, and rinse in a mesh strainer or colander before adding to soup.)

Combine above ingredients in 6 qt slow cooker, turn on low, and check in about 4 hrs. to see if lentils are soft.  They should be quite soft in that amount of time, if they have been soaked overnight.)

When lentils are cooked, add in:

1 14.5 oz can Fire Roasted tomatoes (Muir Glen)
about 6 T. tomato paste
2 tsp Italian Seasoning
1 tsp Poultry Seasoning
1 tsp basil
1/2 tsp pepper
1 tsp of salt, to taste...may need more
1 lb. cooked ground turkey

Allow it to simmer as long as you want to combine flavors...about 1/2 hr to 1 hr?  Don't go too long or your lentils will turn into mush, which is fine, but not quite as attractive.

Serve.  Refrigerate leftover soup.  It just keeps getting better in the fridge!  The next day it will be even more flavorful and re-heats for a beautiful, filling, warming, satisfying lunch.

Here's what the T. of carrots looked like going in:


And here's what they looked like after cooking in the soup.  Isn't it just like magic how they pop right back up?  Dehydration never stops delighting me!

This soup tastes just like fall holidays to me.  I buy my ground turkey from U.S. Wellness Meats and I love it, it has a very REAL turkey flavor, and makes the kitchen smell just like Thanksgiving while it's cooking!  I cooked the turkey on the stovetop just right before adding it to the soup, so both soup and turkey were hot. 

Regarding soaking lentils...most recipes I've seen do not call for pre-soaking.  But I do it anyway.  I have a sensitive tummy, and long pre-soaking of legumes helps me digest them better.  I've had no digestive ill-effects from this lentil soup at all.  But if you do not want to pre-soak you can just sort (for any shriveled lentils, stones, or other foreign objects), rinse, drain, and add to the pot.  That will lengthen your cooking time.  The original recipe says 8-10 hrs on low.  However they also say to put the tomato products in during the cooking time, so that may be slowing it down too.  I learned the hard way:  it's best to wait until your legumes are fully cooked before adding in any tomato products!  Tomatoes will slow, or even halt the cooking of your legumes.

Next time I make this soup I am going to add in some finely chopped spinach, or some of my home-dehydrated kale flakes.  I think it will look pretty, not change the flavor really, and pump up the nutritional value of this soup.  I think also I need to get some celery chopped up and tossed on the dehydrator.  It's super-handy for tossing into soups as well.  I will also be using 2 T of dehydrated carrots instead of 1 T. 

Speaking of dehydrating carrots:  I bought 7 more pounds of fresh, fragrant carrots at the farmers market yesterday.  They are going on to the dehydrator today, as both slices (for soups all winter...I will peel and chop today, and reap the benefit of conveniently tossing in a few tablespoons of carrots, ready to go, all winter!) and I will also do "shreds" of carrot, for adding to meatballs, muffins, breads, wherever I can sneak them in.  I just found a very helpful dehydration resource on the internet:  www.easy-food-dehydrating.com.    I will be using the instructions I found there to do the shreds--the page is linked for you right here.  I was wondering how I was going to pre-treat those tiny shreds...I couldn't imagine blanching such small pieces of carrot.  The video I linked answers that question...toss shreds in a bowl with a bit of lemon juice, then dehydrate on fruit roll tray covers.  Easy!

Wasn't this a simple soup to make?  I loved it, and it's going to go into the winter rotation around here.  No need to sell your birthright when this soup is so easy to make yourself!  Enjoy. 


Sunday, September 22, 2013

Raw Sheep's Milk Cheese, first day of fall, and MORE Italian Prunes

Autumn decorations came out of the boxes today...

Interesting day at the market yesterday.  I bought something totally new and fun:  raw sheep's milk cheese.  All I can say is...sublime.  Just, sublime.

As I may have mentioned before, dairy and I aren't always the best of friends, but, in moderate amounts, and fermented or cultured, I can tolerate a bit.  This sheep cheese is a hard cheese.  To me it was richer, tangier and sort of buttery-er than a hard cow's milk cheese.  Some of these precious jewels were actually cured for a YEAR.  I bought one that is cured wrapped in leaves and coated with herbs.  It was a luxury and a splurge.  I paid $8.00 per block for these little tastes of heaven, and they were worth every.  single.  penny.

Not that anyone cares, but I have to say it made a very satisfying lunch, along with some of my dehydrated walnuts, and some fruit I bought at the farmer's market--a pear, and a pluot  (a plum/apricot hybrid).  It was a fall-ish, quite September-ish lunch.   Simple, fitting fare for the weekend of the autumnal equinox. 


This year the official first day of fall is September 22nd, today, at 4:44 PM, according to the farmer's almanac.  On their website they share a delightful little poem that describes this change of seasons beautifully:

It is the summer's last great heat
It is the fall's first chill: They meet. 
  --Sarah Morgan Bryan Piatt 
 
Does that describe the time of year perfectly, or what?
 
I'm telling you, I think Italian Prunes have got to have the shortest window of availability of any fruit I know.  There was one vendor selling them last Saturday, and they were still a bit green, and yet this week, there was one vendor selling them, and by the time I got there mid-morning there was only 12 lbs left, perfectly ripe...and that was all they had for the season!  Yikes.  So my other plans for the afternoon went out the window; I jumped on it, and bought all 12 lbs.

I wanted to show you another option for quickly getting those little things dehydrated and stashed away for winter munching.  (Who am I kidding, these will be gone by the end of October.)  If you want to be quick, you can just slice them in 1/2, pull out the pit, and then, one technique, which I used here, is to "pop the backs", which is kinda like flipping them inside out.  Alternatively, you could use a toothpick and poke holes in the skin.  A third option, according to some sources, is to just cut them in half and throw them on the tray...however, I haven't tried that, and I'm guessing it would take longer for them to dry that way.  (My most reliable source The Dehydrator bible, recommends the toothpick technique, and to tell you the truth, I can't recall where I learned the popping the back technique.  It's hard to remember...all my favorite books and websites start to blend together after a while.)

Step 1--wash, dry and slice Italian prunes in 1/2.

Step 2--Pop them inside out.


Step 4--Lay them skin side down, and dehydrate at 130 degrees.  Surprisingly, they took a little less time in the dehydrator than cutting the prunes into 1/6 ths!  Start checking them at about 15 or 16 hrs, but depending on lots of factors (size, humidity, etc) it may be up to 19 or 20 hrs..


One thing I like about this technique is how quick and easy the prunes were to prepare.  One slice around the middle and the job was done!  The pit pretty much just falls out.  Another thing that makes this way preferable is that the finished prune is round; no sharp, pointy tips like you get with slices.  I think this is the way I will go from now on.  Here's what it looks like when it is done dehydrating.


This is week I will (Lord willing...) finally be able to get into my "regular" school-year routine, now that my delivery-subbing gig is over, and a few other extra obligations and commitments I took on at the same time.  So...whew.   Look for at least one bulk freezer cooking post this week (spoiler alert: meatballs...) and at least two crock pot posts (I'm going to attempt lentils again, a different recipe.  I just can't leave them alone with a failure hanging out there!) 
 
Happy first day of fall.


Friday, September 20, 2013

Drumsticks, Carrots, and Sandra Lee...

Ok, wow, this is going to be an eclectic post.  I can feel it already.

Today I finished my two-week stint as delivery-girl extrordinaire.  It was fun, and I got a little extra Christmas and cookbook mad-money to stash in the bank.  Oh my...a little rainy-day mommy-fund...for cookbook-buying emergencies.

So, I'm tired.  I've been doing this thing every morning, and this morning it was preceded by a 5:20 AM meeting, for which I had to get up at 4:00.  Hence the scattered nature of this post.  But, I've been doing random things which might be of interest this week, so here goes.

Chicken drumsticks:  for some reason I've been on a drumstick kick lately.  I think it's because they are so quick and easy, cheap (I pay about $7. for 10 of them, organic) and conveniently enough, they bake at about the same temp, for nearly the same time, as a pan of roasted veggies, so when I'm busy and tired, it just gets the job done.  And fortunately, my family loves the silly things, and they go great into the lunchboxes the next day. What's not to love?

I have a friend who is a personal chef.  One day she made the most amazing drumsticks, I figured they must be some sort of complicated chef-wizardry, totally unattainable by the likes of regular moms like me.  So I asked her, and guess what her secret is?  Salt and pepper.  Bake in a hot oven.  Hmm, that seemed doable. 

So here's how I do it, ALL the time:

1.  Wash and dry drumsticks.

2.  Toss with a bit of oil.  (I don't think my friend does this, and actually I'm going to stop doing it...they are plenty fatty on their own, and release it as they bake.)

3.  Salt.

4.  Pepper.

5.  Place on stoneware baking sheet, and bake at 425 degrees (Convection oven) for about 40 minutes.

There ya go, my beloved hard-workin' mamas.  A quick and easy dinner from me to you.  

If you want to flavor it up a bit more you might try Ree Drummond's (Pioneer Woman) recipe.  I haven't made it yet, but if Ree's making it, you know it's good.  And it still looks pretty simple and quick.

On to Carrots...

Busy as I was this week I was still determined to get something put away for winter.  Every market day now I am trying to preserve at least something

Can I rant for a second?  Ok, I am sick of getting produce at the grocery store.  In fact, it's my dream, next year, to put enough away, in season, to avoid the grocery store produce aisle altogether.  I'm fed up with boxed lettuce that has nasty, wilted, moldy leaves stuck in the center where you can't see them until you get home and get ready to serve dinner, and carrots with gross, slimy, brown tops.  I want to do something totally radical here...eat completely in season.  That means we get salad when salad greens grow locally, in spring and early summer.  Not in January.  In winter we'll eat our veggies out of the freezer, and canned, and dehydrated, in soups and stews.  Is that just too wild?  Am I crazy?  Our grandmothers and great-grandmothers would say, "well, duh...?"  That's how everyone used to eat before the days of salad in cellophane bags and plastic boxes.  I'm doing it.  I'm done with paying $5. for a box of greens that are wilty and smell gross--enough I say!!!  No more. 

Oh man, that felt good.  Thanks.  You all are good listeners.

Back to carrots.

I know you're not going to believe me, but dehydrated carrots pop right back up when re-hydrated in a soup or stew...you'd never in a million years guess they were not fresh from the ground.  I did them last year, and just about 2 T of dehydrated carrots is PLENTY for any soup or stew.  And when you dehydrate them you can fit about 25 cups of carrots into a single quart jar.  Don't believe it?  Check this out:

Here are 10 cups of carrots, washed, peeled, and chopped into 1/4' coins.  I blanched them in boiling water for 3 minutes.  Then plunged them immediately into cold water to stop the cooking process. 

Simply lay them out on the dehydrator trays and dehydrate at 130 degrees for 6-10 hours, or until dry and leathery.  Mine took between 9 and 10 hrs.  Store dehydrated carrots in a jar in the freezer.  Imagine all the freezer space I'd have to use if I were freezing them instead of dehydrating them.  My freezer space is limited, so I have to try to conserve. 

When you go to make soup or stew in your crock pot this winter, no need to spend time peeling and chopping carrots, just grab out a tablespoon or two and toss them in the pot!  Maybe a tiny bit of extra liquid to make up for the liquid they will absorb in re-hydrating...about an equal amount should do it, a few tablespoons. 

Before....

And after!

Here they are on the tray ready to go into the dehydrator.

All five trays stacked up and ready to dehydrate...

And here's a close-up of what the carrots look like when they come out of the dehydrator.

Now on to my final comment of the day...I am going to try to convert a Sandra Lee recipe for "Brown Sugar Banana Spice Cake" (baked in the crock pot) to gluten free, and I'm also going to reduce/convert the brown sugar to an unrefined sweetener like honey, or sucanat, or pure maple syrup.  Here is the original recipe.  I will update you when I get it converted. 

Let me just say this:  I adore Sandra Lee.  The girl loves her crock pot.  If I could just hang out with anyone on food network, it would be Sandra Lee.  She's fun, has great energy, and the cutest personality ever...totally BFF material. :)  Now her recipes...well, the ones on "Money Saving Meals" are often ones I can use--from scratch, with real food ingredients like meat, veggies, etc.  However her semi-homemade show...well, not so much.  But the table decorations and party ideas are totally fun. 

The shows I record on Food Network are Sandra Lee's "Money Saving Meals"...my fave.  I absolutely love the cost break-down on all the recipes...something about that is exciting to me!  I know it may be weird, but those cost analyses always make me want to pump my fist in the air and exclaim: "YEEEESSSSS!"  I love a good deal on good food, what can I say.  I also record "Ten Dollar Dinners", Melissa D'Arabian--love her kitchen set, and her food always looks really good, and do-able, and she gives great tips.  And finally, "Pioneer Woman", Ree Drummond.  Another BFF candidate!  She's cute as can be, and also very "real"...her food is not usually stuff I would make, but it's fun to watch and I love her set, ranch, and sweet family.  I don't always get to watch all three of these shows every week, but I save them up and slip them in on a Sunday afternoon from time to time.  Those are my favorites...not that anyone cares.  Just thought I'd throw that out there.  How about you?  What's your favorite cooking show?  You KNOW you have one.  Chime in the comments and tell us.     

Tuesday, September 17, 2013

Fish Sticks for the freezer --(updated: 9/20/11 regarding stoneware cookie sheet...)

Who doesn't love fish sticks? 

Fish sticks and chicken strips are Friday night fun food in Slow-Cookin'-Mama's household, but wait...how fun is that for me to have to make a big mess when I'm tired on Fridays, and just want a nice, quiet movie night?

Ahhh...enter: freezer fishsticks and chicken strips.  Store-bought fish sticks and Chicken Strips are totally out of the question around here, for the obvious reason that they contain gluten. 

However, other questions remain about store-bought fish sticks and chicken strips, such as:  Source...did the chicken come from a CAFO (Concentrated Animal Feeding Operation, A.K.A, Factory Farm)?  (Yes, it did.)  Or in the case of fish sticks, was the fish wild-caught in the waters of Alaska, or was it farmed, or perhaps caught in less-than-pristine waters?  And the next question to arise is that of:  other ingredients...such as: sodium tripolyphosphate, TBHQ, and other additives and preservatives. 

No thanks.  Not when it is SO ridiculously simple to make my own and freeze them.  When I'm ready to serve them I simply pull them out of the freezer and bake.  No thawing; just freezer to oven.  Like...well...frozen fish sticks and chicken strips you'd buy from the store!

There was a good deal on wild-caught cod today; so even though I was busy until mid-afternoon I bought 7 lbs and made them into fish sticks for tonight's dinner, and two other nights in the future when I won't have to dirty a single dish, or spend a single minute in preparation...MWAAA HAHAHAHAHA!  (Evil laugh...) That's two Friday nights off for Slow Cookin' Mama.  I guess that will make me NO-Cookin'-Mama.  I like the sounds of it.

So, I very, VERY loosely base my procedure here on Jamie Oliver's Crunchy Garlic Chicken recipe.  When I say very loosely, I mean, not really at all.  I started with that recipe, but here's what it has morphed into:  I fill my food processor with rice chex, about 2 T melted butter, about 1-2 tsp Italian Seasoning, salt, pepper, and about 1/2 tsp paprika.  Pulse it until it gets to be the consistency of sand.

Then I prepare three bowls:  1 with several eggs, well beaten.  1 with the ground chex mixture, and 1 with Pamela's GF baking mix.

1.  Wash, dry and cut fish or chicken into strips, or squares.

2.  Shake fish or chicken pieces in the bowl (covered!) with Pamela's to coat.

3.  Dip pieces in beaten egg.
 

4.  Coat pieces with chex mixture.
 

Then just lay the pieces on a parchment-lined baking sheet and freeze.  I usually put foil on top. just to keep them from touching other things in the freezer.
 
The next day (don't forget!)  go back and put them into a freezer bag.  Seal and date.

This works equally well for chicken or fish.  Jamie Oliver says to bake at 475 degrees, but I like to bake on a stoneware baking sheet, and that's too hot for stoneware, so I usually lower it.  (*UPDATE:  I should clarify, I use stoneware when I make these FRESH...but coming out of the freezer I use a regular metal cookie sheet.  The temp difference between frozen fish and a 425 degree oven is too radical for stoneware.  It could crack.)

I bake my fish at 425 for, I dunno...15-20 minutes?   Depending on size of the fish pieces.  Just until it's done--should be opaque (not translucent like it is when it's raw) and it should flake easily.  The chicken, I prefer to take the heat way down to 350 and bake them for 35 minutes, flipping halfway through the cooking time.  Chicken should be cooked through, and any juices you see should run clear.  Just to be sure I pop a meat thermometer in it to check temp. (Some chefs would say a lower temp than I use, but I'm not a chef, just a mom, and a total food safety freak, so I like to always take it up to the FDA recommended safe temp for chicken; 165 degrees.)

Now let's discuss breading options:  Jamie Oliver's recipe recommends crackers, other people use Panko, or GF Panko, or whatever breadcrumbs you like or have on hand.  I started using Rice Chex when a gluten free friend recommended it to me several years ago...oh man I do love it.  It's nice and crispy and tasty, however I'm not usually a big fan of processed cereal flakes of any kind.  I've read that "puffed" grains, or grains that have been extruded into flakes or shapes, (like all commercial cereals) are not very healthy to consume (see Sally Fallon's book Nourishing Traditions for further details...).   We don't really ever eat boxed cereals here, so I kinda look the other way in the case of using Chex to coat my fish sticks and chicken strips.  Eh.  Life's short.  I'm going to go out on a limb and use a little rice chex every now and then.  I'm just crazy like that.

Have a happy finger-food Friday this week, from my house to yours.

Monday, September 16, 2013

#18 Butternut Squash Bisque

I bought my first Butternut Squash of the season on Wednesday.  I always get my squash from a gentleman at the farmer's market whose farm is a couple miles from my house.  Can't get much more fresh or local than that.

Last year, I was there at the Farmer's Market the very last day, last hour, last minute of the season before it closed for the winter.  It was just me, and about 4 vendors.  Only the hardiest of souls remaining, we were going to hang on 'til the very end.  By that time (end of October) pretty much everything is gone, except for the very last of the late-season squashes, apples, pears, and few other stragglers.  This particular day was especially cold and rainy, and I was shivering as I looked around and made my very last purchases of the year.  When I came to the pumpkin/squash stand, I pretty much bought everything he had left.  I made multiple trips to the car with armloads of butternut, acorn, and spaghetti squash.  I must've looked chilly and a little forlorn as I shivered in the drizzly rain, gathering in the last bit of what I could, because this farmer neighbor of ours figured I really needed a cup of hot coffee, which he generously provided. 

I love the lively vigor and anticipation of the first market day in the spring, but there is also a very rich, bitter-sweetness in saying goodbye to the market in the dark, crisp days of late October.

The overflowing boxes of squash from that last market day (which I got at a bargain price by the way, because of the volume and timing of my last-second purchase) kept beautifully in my garage.  I placed them in boxes, covered by a large towel, on top of the deep freeze, and ate them all winter.

Fast forward to the present, and my very first butternut of this year:
Hello beautiful.
 
 
Man, I've really missed the squash.  I quit eating it in the spring when the new veggies started coming on, and I was really sick of it then, but now, heading in to fall, it's starting to sound good again. 

Butternut squash is a funny thing.  It really does taste "buttery" and "nutty", somehow.  It always feels and tastes almost like dessert to me.  Especially when I cut it up in chunks, toss it with some oil and salt and a tiny bit of cardamom, or cinnamon, and roast it in the oven...sublime.
 
However, we're going another route with this beauty today..."Butternut Squash Bisque" (from Healthy Slow Cooker Cookbook), which is simply a thick, creamy butternut squash soup, made in the crock pot.  Today is a busy day, and I need this soup to babysit itself for a while.
 
So why the fancy name, you ask.  Good question.  Personally, in this case, I think it's all about the alliteration..."Bisque" just sounds good with "Butternut".  Actually, in modern usage, bisque has come to mean any type of thick, creamy soup that has been blended to be smooth, not chunky like a chowder.  However, traditionally, a bisque was a seafood-based soup that was blended to be smooth.  There is no seafood in this dish, (thank goodness!  I think fish and butternut squash blended together would be horrific!) so the modern interpretation of the word is being used here.


This was a totally easy way to get a nice veggie side going on while I was busy with other things today.  It was simply butternut squash, peeled, seeded and chopped, carrots, red onion, chicken stock and some seasonings.   It cooked on high for 4 hours, and then I stuck an immersion blender in there to blend it up.  The recipe says to puree it in a blender, but an immersion blender is much easier and quicker and a LOT less mess and hassle. AND, you eliminate the risk of blowing the top off your blender with hot, steamy soup inside!

Half and half is added at the end along with some salt.  One beef I have with this book is that it WAY under salts everything, in my opinion.  Of course you can adjust salt to taste when you serve it.  This soup was a big hit. It was quite thick and flavorful, and everyone liked it a lot.  I really loved the beta carotene in this dish!  It was a pretty orange-y/yellow color and stunning with a swirl or 1/2 and 1/2 on top.  We ate this soup with turkey and cheese sandwiches and called it good.  It was, in fact, very good.

Sadly, it is nowhere to be seen on the internet, so once again, I must point you to your local library for the hard-copy book for this one.  Or, there may be similar recipes on the internet, but this one had some unique flavorings (coriander was one...) that I wouldn't have expected, so you may want to check it out.

Welcome back Butternut Squash, it's good to see you again!


Saturday, September 14, 2013

Carpe Bell Peppers!

Seize them!  Grab hold of the peppers, right now, today, my friends.  They're not getting any cheaper, or better, than they are at this very moment.


My mom's small, but shockingly prolific garden, just keeps pumping out the peppers and tomatoes.  She brings them by in bags, and within an hour of picking they are washed, chopped, and squirreled away in my deep freeze, just waiting for a mid-winter day when I will toss them, along with an onion and some beef strips and seasonings into the crock pot for some excellent, fast, inexpensive, and super-nourishing tortilla filling.

Let's focus for a moment on the fiscal rewards of stashing away some peppers:

I may have mentioned this before, but the price of peppers swings wildly according to seasonality, (like everything else...).  Red and yellow and orange peppers were $1. each at the farmers market on Wednesday, but today I bought them bagged at the farmers market, and they averaged .72 each.  At the store today they are $2. each. 

I bought 33 red and yellow peppers at the farmers market today, and paid $24.  If I had bought them at the grocery store today it would have cost me $66.00!  In the winter time I see them go up to $2.50 each at the grocery store, so if I had to buy these peppers over the course of this winter I would end up paying a whopping $82.50!!!

The way I see it, by buying and freezing these now, instead of nickel-and-diming them one at a time all winter I just saved/earned $58.50.  That's 58 bucks we did not have to earn; and completely tax-free, baby.


So, consider the ways you will use peppers this winter:  fajitas?  (Yes, weekly, either chicken or beef, in the crock pot, at my house...how about yours?)  Soups?  Stews?  Breakfast scrambles and Christmas morning breakfast casserole? 

Now, I pretty much always like my peppers chopped, in bite-size chunks, no matter what I am putting them in, but maybe you prefer strips, for fajitas or stir fry dishes.  Decide how you will use them, and how often you will use them, then wash and chop accordingly.

Peppers have got to be one of the easiest things on earth to preserve, if you have a bit of freezer space.  One recommended technique is to simply wash, dry, chop, freeze in a single layer on a cookie sheet (I use parchement to line the sheet), then bag and label. ( Here is a link to these simple instructions from the University of Nebraska, Lincoln. )

I actually just put the chopped peppers into freezer bags and freeze them flat.   That's pretty much it.  No pre-treatment, no blanching.  Just a basic chop, and freeze. 

One thing I've started doing is using a NEW, dedicated to veggie-cleaning only(!) toothbrush to clean the tops of peppers, near the stem where dirt likes to hide in all those little grooves.  I wasn't able to get at it with a regular veggie cleaning brush because it was too big, and found that  a toothbrush was just the right size. 
 
The lady I buy my peppers from at the market recommended freezing some whole for stuffed peppers, which I thought was a great idea, so I did some like that too.  Just wash, dry, remove the tops and any seeds/white membranous stuff inside, and freeze.


When you buy peppers at  the market (or get them from a gardeningly talented mom or friend, or grow them yourself!) they are still SO full of life.  Full of sunshine!  They have ripened perfectly on the vine in the sun, for full development of nutrients.  Unlike peppers you find in the store that were picked long before they were fully ripe, and shipped long distances (probably exposed to heat in their long travels).  Those factors, combined with the simple ticking of the clock since they were picked, makes for a big reduction in nutrients.

There's a handy little book, a classic work I refer to again and again, called Putting Food By, by Janet Greene, Ruth Hertzberg, and Beatrice Vaughan. This convenient guide gives me a quick run-down on the basic procedures of drying, freezing or canning just about anything.  A quick Google for university extension publications works too.

Something about putting some summer food away for later is just comforting to me, very warm and fulfilling.  There's some sort of strong instinct, way back in my brain, that makes me want to start stashing nutrients at this time of year, to nourish my family when it's dark and cold.  I feel it coming.  The days are getting shorter.  And it always triggers a sense of urgency in me.  No matter what, I'll be there, at the farmers market, getting whatever I can until the last squash is sold, because winter is long.  And the first tiny leaves of spring are a long way off.

Thursday, September 12, 2013

Our latest addition...

I know it's wrong. 

But something followed me home...

It was so cute and all alone....can I keep it?  Pleeeeeease?

I know what you're saying..."this looks exactly like a red Crock-Pot "Cook and Carry" you bought less than a month ago".  See, that's where you're wrong. 

#1: this is silver, not red. 

And #2: this is a 6 qt. oval, not a 4 qt oval.

Huge difference my friends, huge.  And yes, I do already have a 6 qt round crock pot...but much of the time, it's chock-full of chicken-stock, brewing on the counter for 12 or more hours, so it takes the 6 qt round totally out of commission on those days.  Also, that 6 qt is round, and this one is oval.  See, in a oval 6 qt crock pot you can do all kinds of fancy tricks, like baking!  Yes, baking!  Like, in a loaf pan, sitting in the crock pot, elevated with a foil ring. That's what I hear anyway.  Can it be done gluten free?  Well, we are going to find out.

This crock pot was on a smokin' sale: $34.99 at Shopko.  What can I say?  Some people love to spend a lot of money on booze...and smokes...and fast food, and other detrimental stuff.  As far as vices go...I'll take crock pots.

Actually, I think I may be a woman who can actually justify having 5 crock pots of various sizes, shapes and styles, because believe it or not, I left the house this morning with 3 crock pots cookin'.  One with chicken stock, one with my freezer ratatoullie test, and one with tonight's dinner, Lime Salsa Chicken, which rocks by the way...please make it.  You'll thank me.

I don't know, something's really up with me lately.  I am just a little "stuck", you know what I mean? I'm at a creative stand-still.  Brain-freeze...and not in an ice-cream induced way.  I can't seem to get into this whole September thing.  I mean, I know.  I'm totally beating a dead horse here, but seriously, I'm just not transitioning well.  I'm suddenly dull; un-inspired, non-creative, not-excited, un-interested.  I just can't seem to get into this whole structured routine again.  This is how bad it is...I received my long awaited, pre-ordered Slow Cooker Revolution volume 2...and I didn't even open it for two days.  Mid-life crisis?  Just plain laziness?  Who knows, I'm at a loss here. 

Usually I hate shopping.  I mean, I'm a girl who waits until I'm totally desperate for clothes...then I go in, find something that will work, buy it in every color, and call it a day.  Shopping is a major time-waster in my opinion, and it usually annoys me...(except for book shopping on Amazon of course.)  I'm typically a busy little bee, dutifully getting my work done at home and abroad.  Working on projects and tasks, cleaning, organizing, studying, reading, swimming, walking the dog, dehydrating food, blogging, cooking, grocery shopping, errand-running, working, crafting, and a zillion other things all at the same time. 

But the last two days, I've shopped.

In an avoiding-my-work kinda way. 

I'm procrastinating. 

That's how I ended up with my new little buddy pictured above.  And a fall doormat.  And some adorable owl paper plates and cups.  And some green capris.  And a bunch of hand-soaps.  And some lovely pumpkin hand lotion.  Anyway.  Hope this thing passes soon, whatever it is.  I'm running out of room in my kitchen, and I'm about to go broke.

I should be outside with the hose, spraying bugs off the lights in the front driveway, but guess what, I'm going for a bike ride tonight instead. 

Enjoy one more night on the lights, driveway bugs.

Wednesday, September 11, 2013

#17 Rustic Two-Cheese Ratatoullie--excellent.

Today's market haul...

Carrots, zucchini, butternut squash, eggplant, onions, tomatoes, and red peppers...looks like ratatoullie to me.
 
 
Another day of running like crazy, but I did dash into the farmers market while I was in town today, for a quick fix of local veg. 
 
My family is crazy about ratatoullie.  In the midst of enjoying the late summer non-schedule, I usually make it by the traditional French technique of sautéing each veggie type individually, ending with tomatoes, to de-glaze the pot, and finally combining them all for a little simmer time at the end.  Delicious. 

But that's summer.  Not September.  And standing there sautéing the veggie types individually was decidedly NOT fitting into my schedule today.
 
So, with serious trepidation, I reluctantly decided to try out "Rustic Two-Cheese Ratatoullie" from the Healthy Slow Cooker Cookbook.   It's your basic "chop and drop"...everything into the pot at once and walk off.  Come back 3 1/2 hrs later to some version of ratatoullie. 
 
I really had my misgivings.  It just didn't seem possible that ratatoullie could be "right" without the individual sautés...but guess what?  The easy crock pot version was really, really good. 

It was just your basic ratatoullie veggies:  EZ POT. (Eggplant, Zucchini, Peppers, Onions, and Tomatoes...EZ POT.  That's how you remember the order in which they get sautéed, when going the traditional route...thanks Melissa D'Arabian for that awesome acronym!  Here's her classic French ratatoullie recipe that I use when I go the traditional preparation route.)

I peel my eggplant by the way. I can't stand the way the eggplant peel squeeks between my teeth. 

The crock pot ratatoullie included dried herbs and a splash of balsalmic vinegar at the very end--nice touch.
Here's the pot full of ratatoullie, not yet cooked.
 
And here it is, ready to devour, served over brown rice pasta.
 
My family loved this dish.  It went into the crock pot as I dashed (once again) out the door to pick-up/drop-off for school and piano lessons.  By the time I got home it was smelling good.  And by the time hubby got home it was smelling really good.  We ate it over gluten-free organic brown rice pasta, and tossed some Italian cheeses on top.  Oh my.  Oven roasted chicken drumsticks on the side.
 
This....was a good meal.  Definitely going to be making this one again and again.  The quick way.  To tell you the truth, it didn't really taste much different from the lengthy traditional technique...except that it took a small fraction of the time to prepare.  I must say that the tomatoes and onions didn't caramelize and thicken of course, like they do on the stovetop...the crock pot version was more liquid, sort of "brothy".  Thin juices.  But the flavor was all there, baby.  Good stuff.  And truthfully...crock pot ratatoullie is much better than no ratatoullie at all, which is how it would be if I had to do it on the stovetop...just not even possible on a day like today.
 
As long as I was chopping stuff--I went ahead and doubled it, and put the other 1/2 of my choppings into a ziplock and froze it.  I'm going to attempt to simply thaw it, and dump it into the crock pot another busy day; and I'm guessing it will work great.  In fact, I'm pretty confident that it will work, so I'm going to stock up on EZ POT at Saturday's market and do up about 6 gallon ziplock bags full of ready-to-crock pot ratatoullie.  It will look terrible thawed, not all bright and crisp like it does fresh, but seriously, once it's cooked?  I don't think it will matter at all.  I'm pretty sure we'll never know the difference.  And all that vibrant summer nutrition will be sitting there in the freezer, dormant, just waiting to be consumed.
 
 
This specific recipe is nowhere to be found on the net, but there are millions of crock pot ratatoullies out there, and you know what?  I bet they're all just pretty much another version of EZ POT.  You could look in the book for this excellent recipe, or locate a similar one elsewhere.  Either way....I'm here to witness that ratatoullie CAN be done in the crock pot thank-you-very-much, and delightfully so.
 
Want a little pre-view of tomorrow?  Check out the market photo above...the items I did not use up in the ratatoullie are going to be the super-stars of tomorrow's post. ;)


UPDATE:  This made for some crazy-good (and fast) lunchbox filling the next morning.  Toss the leftover ratatoullie with the leftover pasta, a drizzle of olive oil, and chunks of leftover chicken.  Top with cheese if desired.
Pop the lid on.  How quick was that? 
Some dried plums and a rich piece of very dark chocolate rounded out this meal.
 
 
UPDATE #2:  I couldn't resist...I pulled out my bag of frozen ratatoullie this morning to test it.  I let it thaw on the counter for about 45 min, and then opened the bag and dumped the still-somewhat-frozen contents into the crock.  Low, 4 hrs.  When I came home it looked exactly like it did fresh--WINNER!!!  Maybe a little more watery.  I've currently got the lid off-set to let the liquid reduce.   Another 30-60 minutes should be all it takes.  Hooray...EZ POT freezer bags coming up this weekend.